Setup module is for configuration settings and master entry forms for other modules to run whole Clinic Medix system properly. This module has 11 sections –
- Settings
- Patient
- Hospital Charges
- Bed
- Print Header Footer
- Front Office
- Pharmacy
- Pathology
- Radiology
- Finance
- Birth & Death Record
- Human Resource
- Inventory
- Settings – this section has 10 parts.
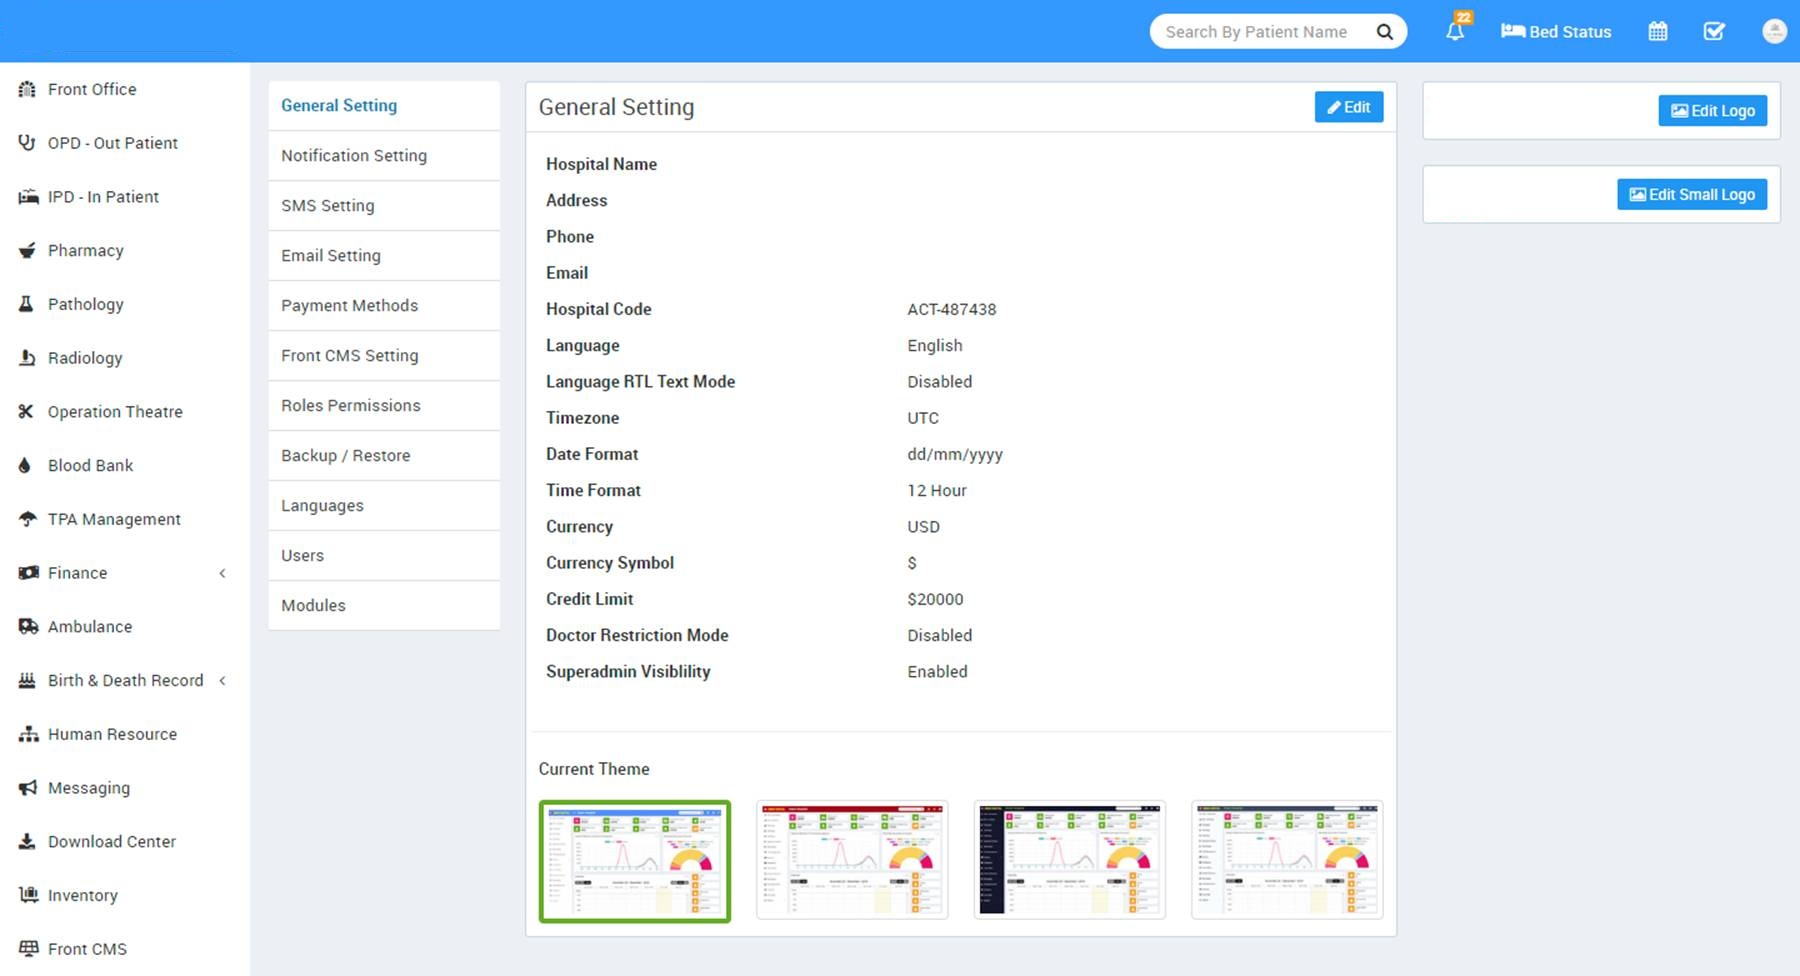
- General Setting
- Notification Setting
- SMS Setting
- Email Setting
- Payment Methods
- Front CMS Setting
- Roles Permissions
- Languages
- Users
- Modules
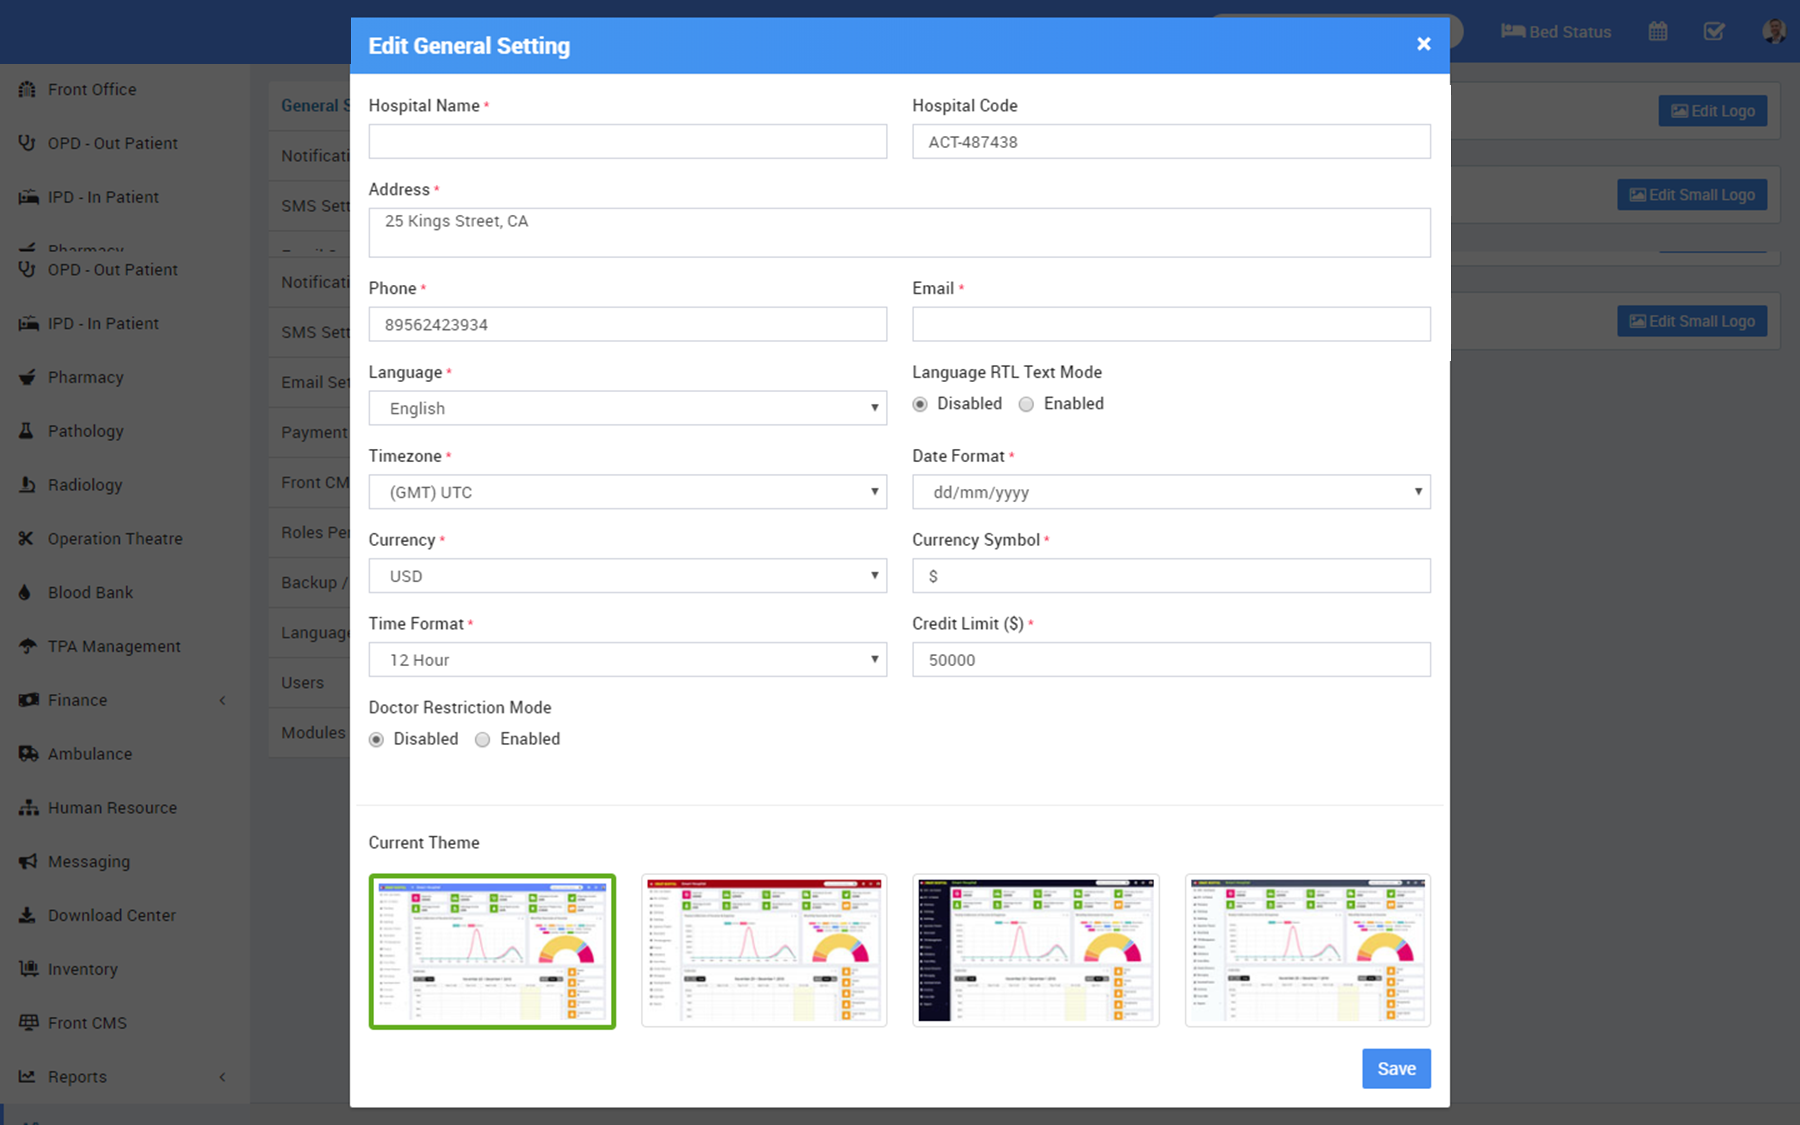
- General Setting – Update your Hospital Name, Address, Phone, Email, Hospital Code (Hospital Code is your hospital registration / accreditation no), Language (language in which you want to run your Clinic Medix), Language RTL Text Mode (for Arabic languages), Timezone, Time Format, Currency (ISO standard 3 digit currency code), Currency Symbol, Credit Limit (used for IPD module balance amount credit limit), Doctor Restriction Mode (if Doctor Restriction Mode is disabled then all doctors can see other doctors patients in their account and if Doctor Restriction Mode is enabled then doctors can see only their assigned patients in OPD, IPD, OT and Appointment), and select Current Admin Theme, now click on Save button to update record.
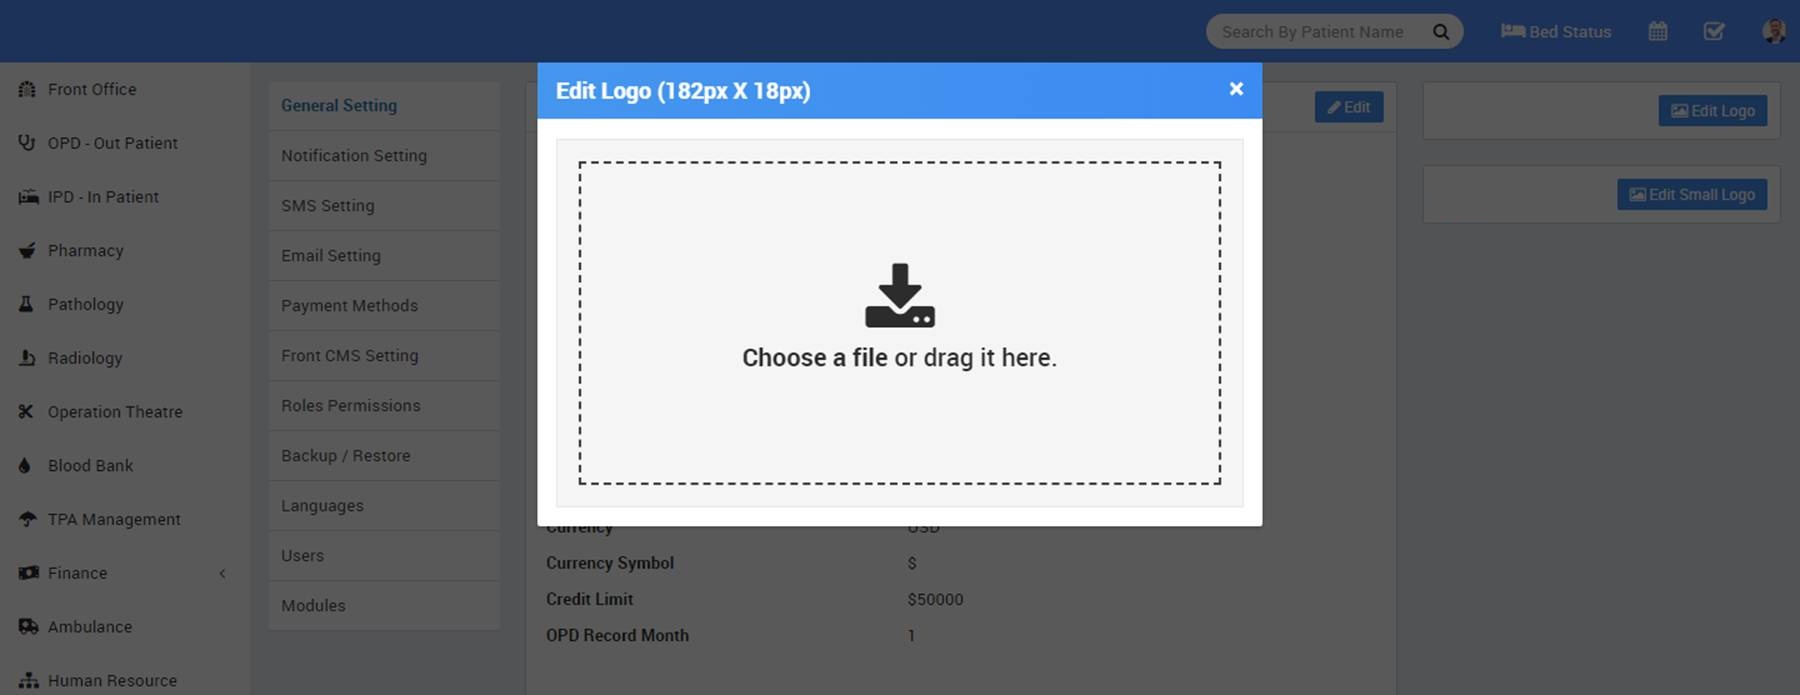
For updating your hospital logo click on right column Edit Logo buttons.
- Notification Setting – in Clinic Medix there are 6 events OPD Patient Registration, IPD Patient Registration, IPD Patient Discharged, OPD Patient Revisit, Login Credential and Appointment Approved where automated Email / SMS are sending to concerning person’s email / mobile number. To control, when email / sms notifications will be send use Notification Setting.
Check the following at which event, which person receive notification
- OPD Patient Registration: OPD Patient
- IPD Patient Registration: IPD Patient
- IPD Patient Discharged: IPD Patient
- OPD Patient Revisit: OPD Patient
- Login Credential: Patient, Staff
- Appointment Approved: Patient

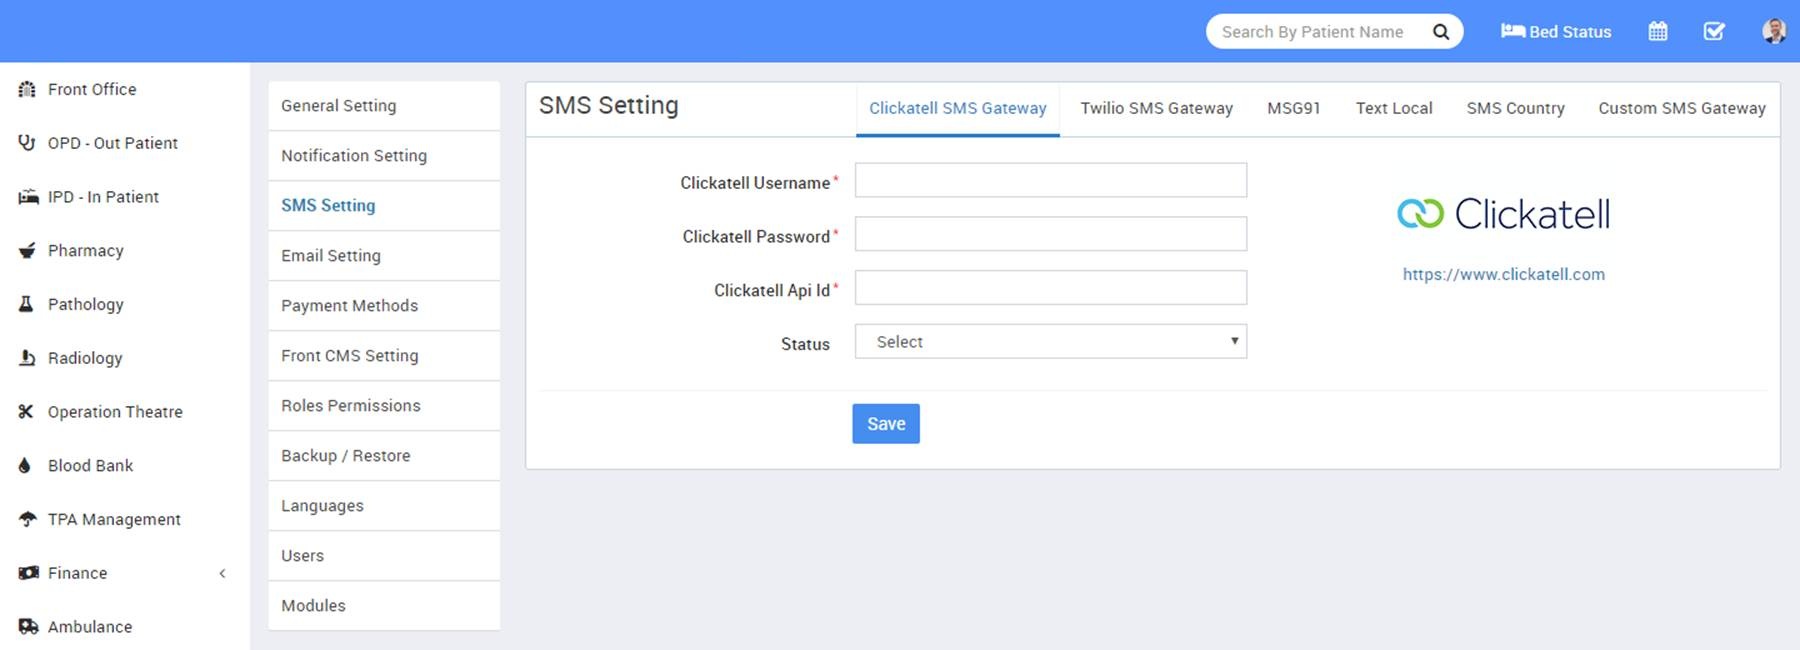
- SMS Setting – for SMS notifications to patient or staff you must have to add SMS Gateway details in Clinic Medix. Add Clickatell, Twilio, MSG91, Text Local, SMS Country or Custom SMS Gateway with the required details. You can add multiple sms gateways but only one can be enable at a time. You can also add any other http api based sms gateways through Custom SMS Gateway but it need to configure SMS Library in source code and require PHP coding skills. Through this you can add any SMS Gateway which supports http based api.
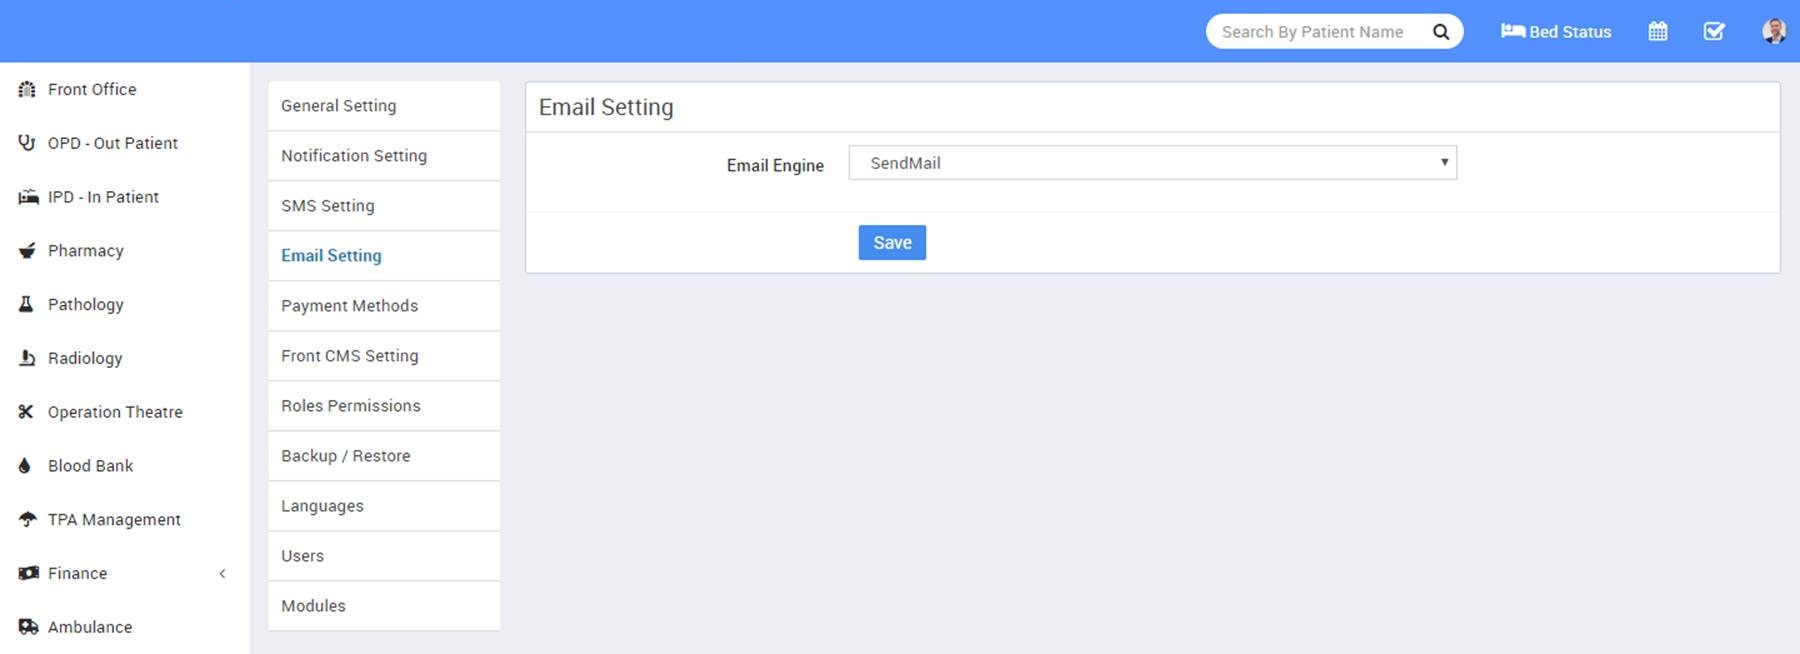
- Email Setting – to send emails from Clinic Medix you need to configure Email Setting. Currently Email is available for SendMail and SMTP delivery engine.
Select SendMail email engine to send emails through your hosting SendMail program. By default SendMail is set as Email Engine. SendMail can only work and send emails if your cpanel hosting supports it. If SendMail not sending email then contact to your hosting provider. Since SendMail is easiest but less reliable so check your spam folders in email inbox because sometimes emails detected as spams if using SendMail.
Another option is to use SMTP as email engine. Select SMTP email engine to send email using any SMTP relay. You can use Gmail or any other free SMTP service provider to use SMTP email engine.
To use Gmail SMTP using your gmail email account, enter following details in SMTP Engine –
- SMTP Username: your gmail email id
- SMTP Password: your gmail email account password
- SMTP Server: smtp.gmail.com
- SMTP Port: 587
- SMTP Security: tls
and finally click on Save button to save your settings. After this login to your gmail account then visit: https://www.google.com/settings/security/lesssecureapps then toggle on.

After above settings you will receive email successfully but if you are still not receiving emails that means you hosting provider has blocked external smtp ports or services in this case please contact to your hosting provider for smtp issues.
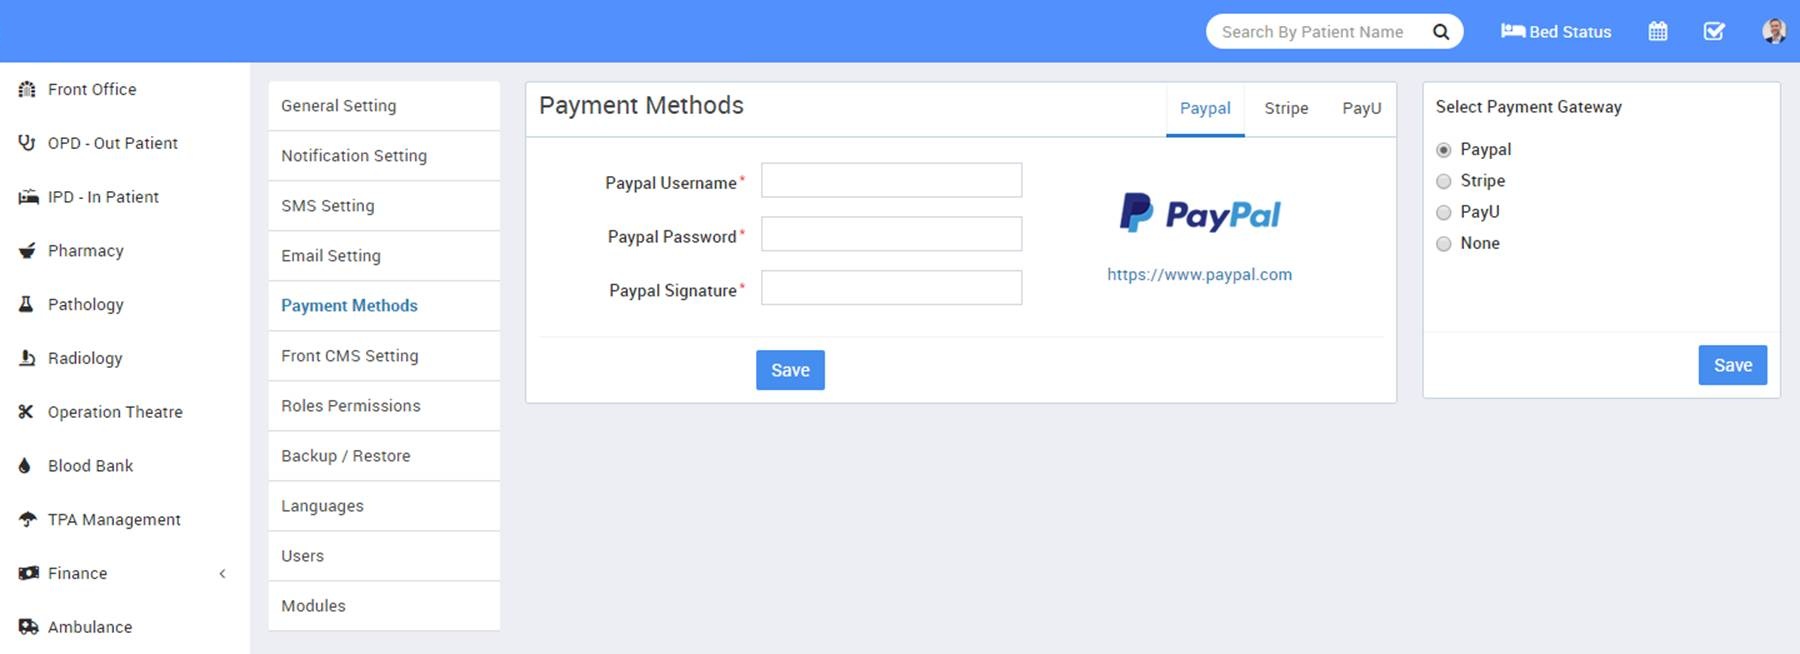
- Payment Methods – there are 3 payment gateways Paypal, Stripe and PayU available in Clinic Medix. For enabling patient or their guardian to pay IPD bill payment online through Patient Panel then you must have to enter and enable any one of payment gateway. You can add multiple payment gateway details but you can enable only one at a time. Add your payment gateway account details in required fields, then enable that payment gateway.
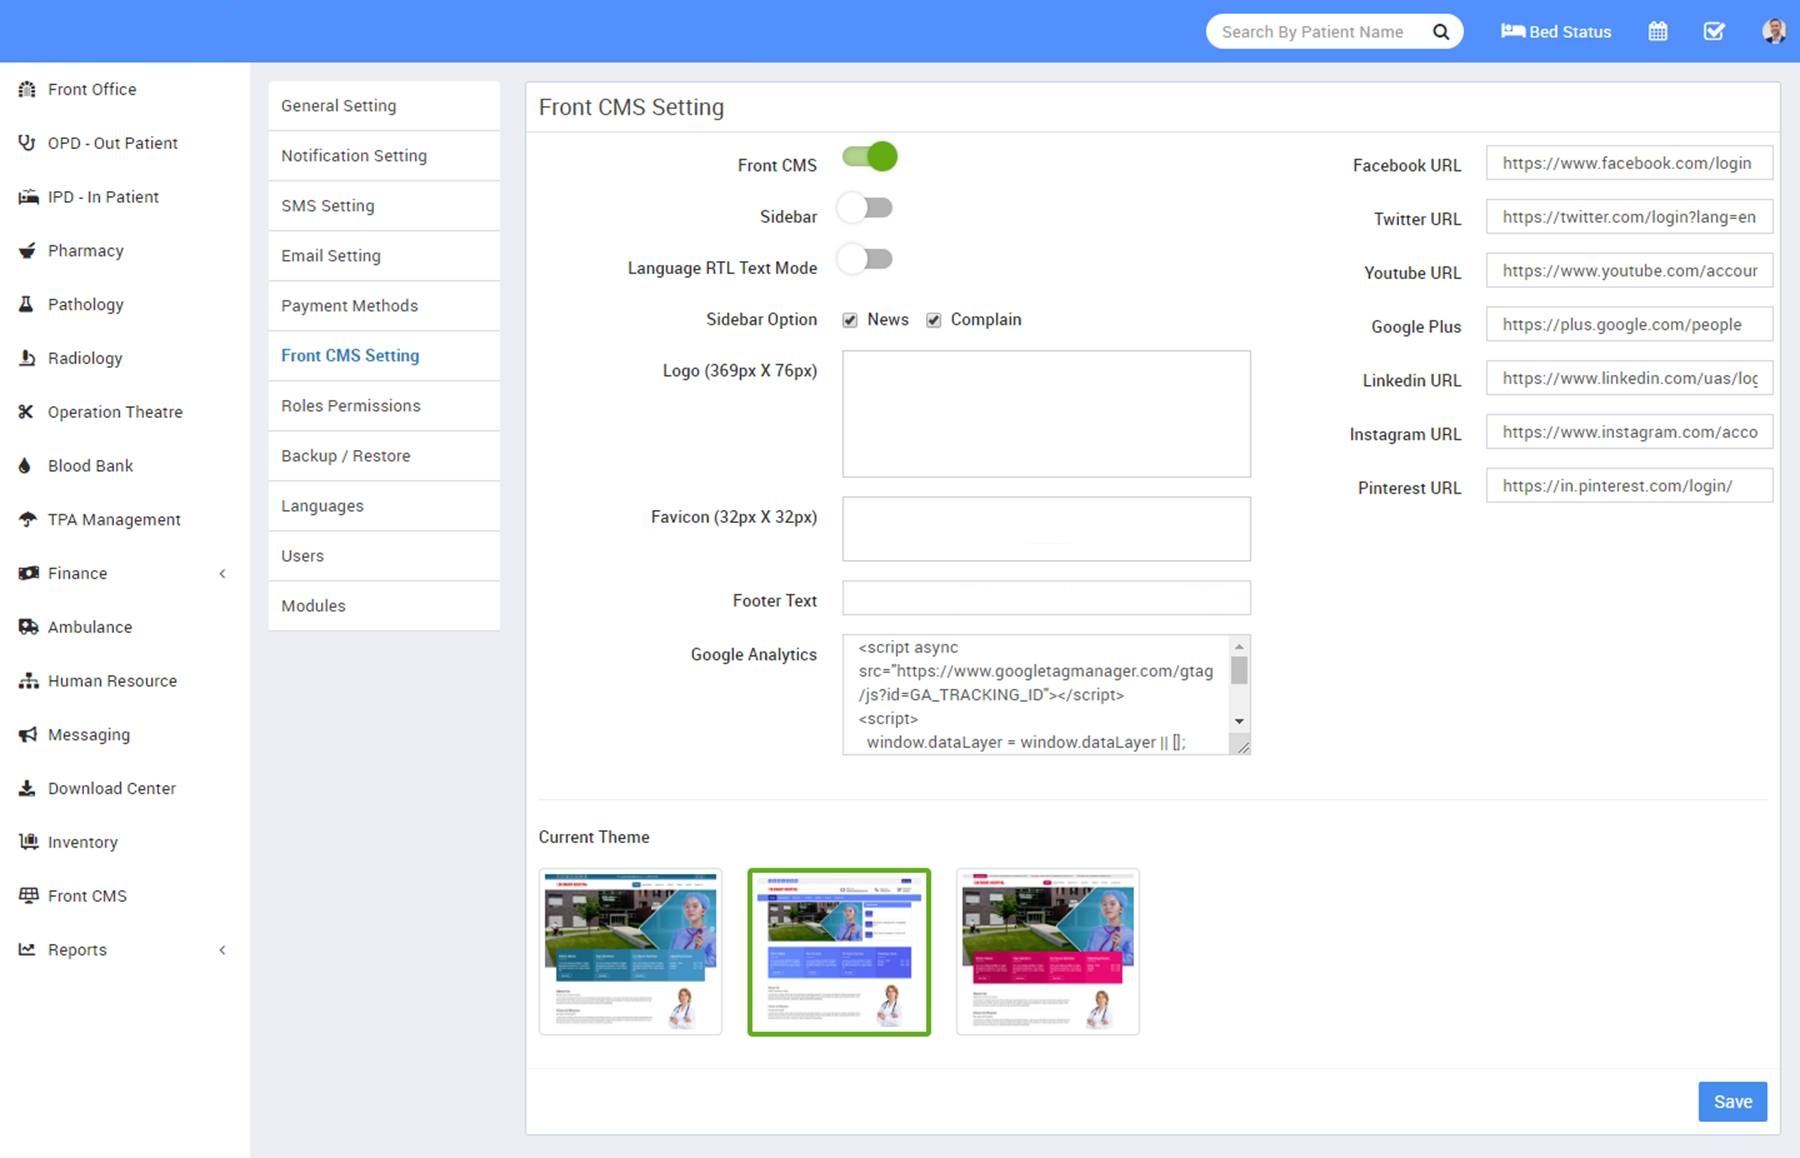
- Front CMS Setting – here we can enable/disable Front CMS, Sidebar, Language RTL Text Mode, check Sidebar Option, upload Logo, Favicon, enter Footer Text, Google Analytics, Facebook URL, Twitter URL, Youtube URL, Google Plus, Linkedin URL, Instagram URL, Pinterest URL and Current Theme.
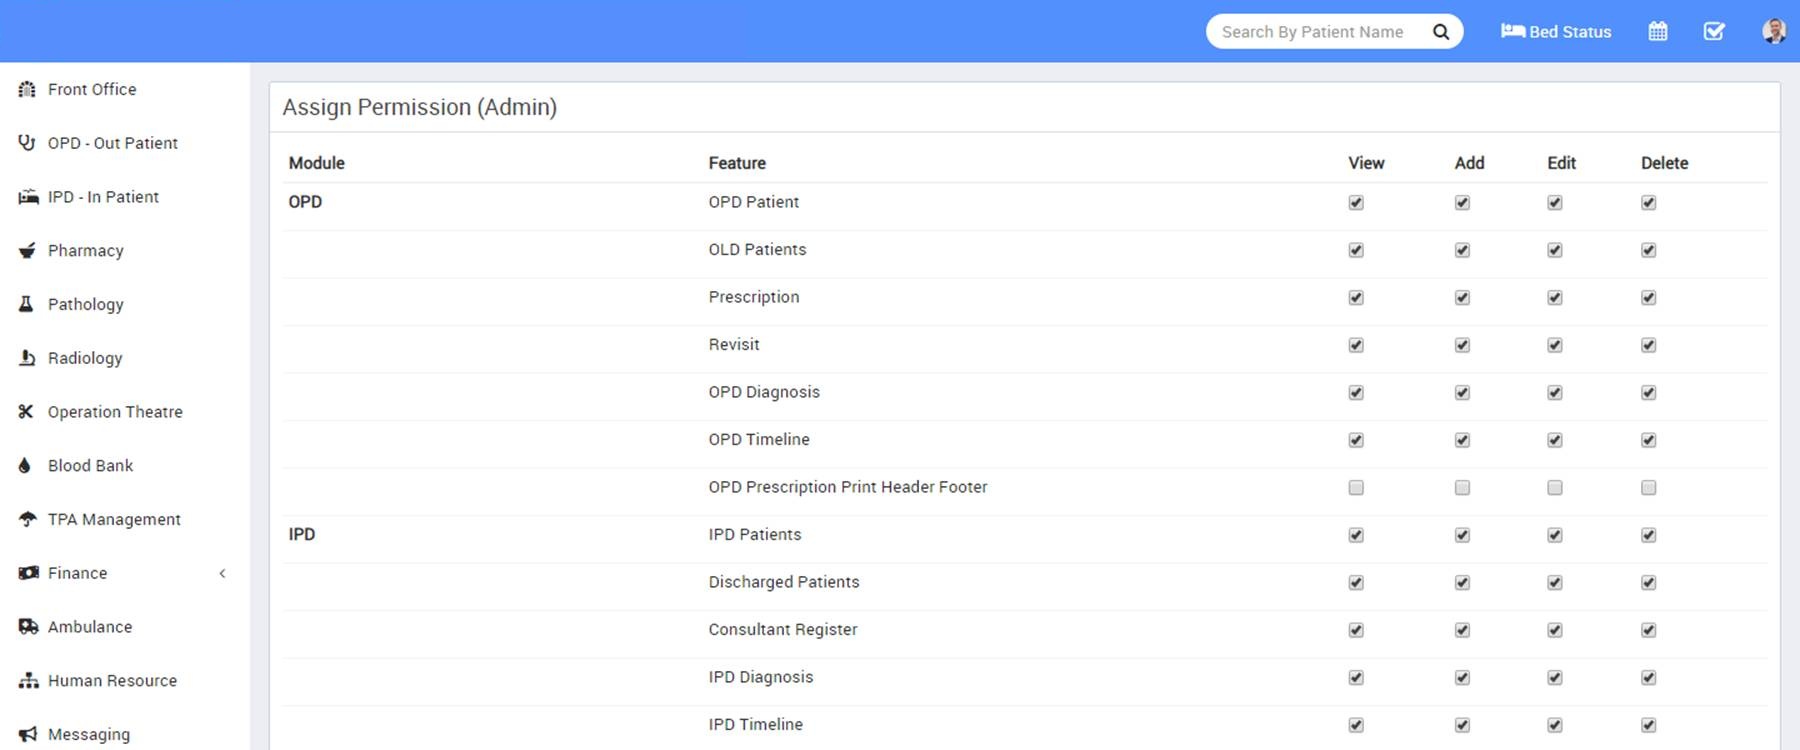
- Roles Permissions – here we can create different Roles for staff users and then assign different user permission to this Role. To add new role enter Role Name then click on Save button all existing roles can be see from right side of this page. By default in Clinic Medix you will get 8 user roles Super Admin, Admin, Accountant, Doctor, Pharmacist, Pathologist, Radiologist, Receptionist, Nurse. You can edit name or permission of these roles except Super Admin.
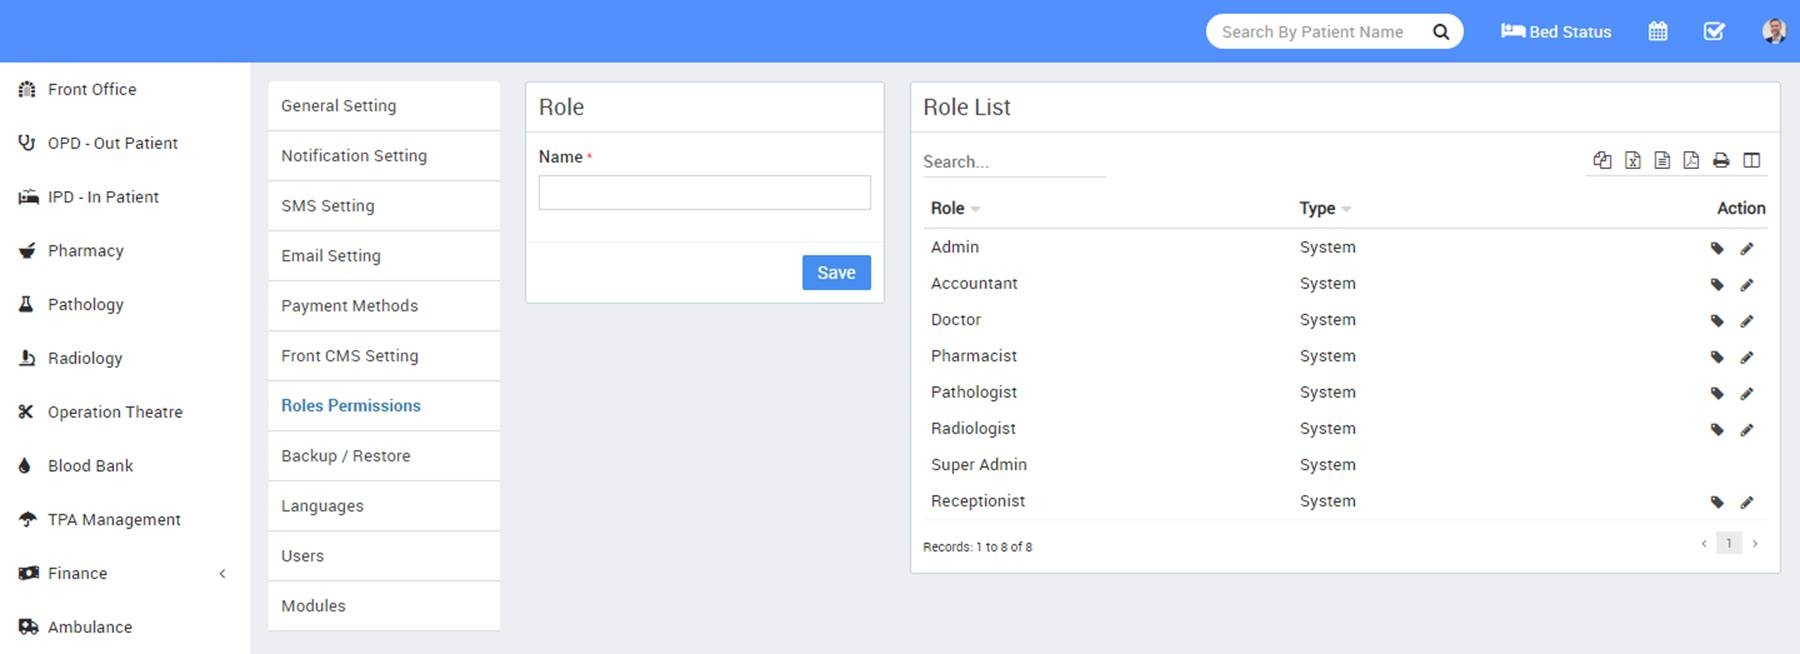
To assign permission click on Assign Permission button from Action column. At this page you can see Module wise different features and their different permissions. Carefully assign different permissions on roles. After assigning permission, check where it is effecting in system. There are 4 types of permissions present here View, Add, Edit and Delete. Here note that if you are assigning Add/Edit or Delete permission then View permission should be given obviously if you have not given View permission then system can behave inconsistent so in best practice if you are giving Add/Edit/Delete any one permission then give View permission too.
- Languages – Languages other than English are translated in 72 languages.
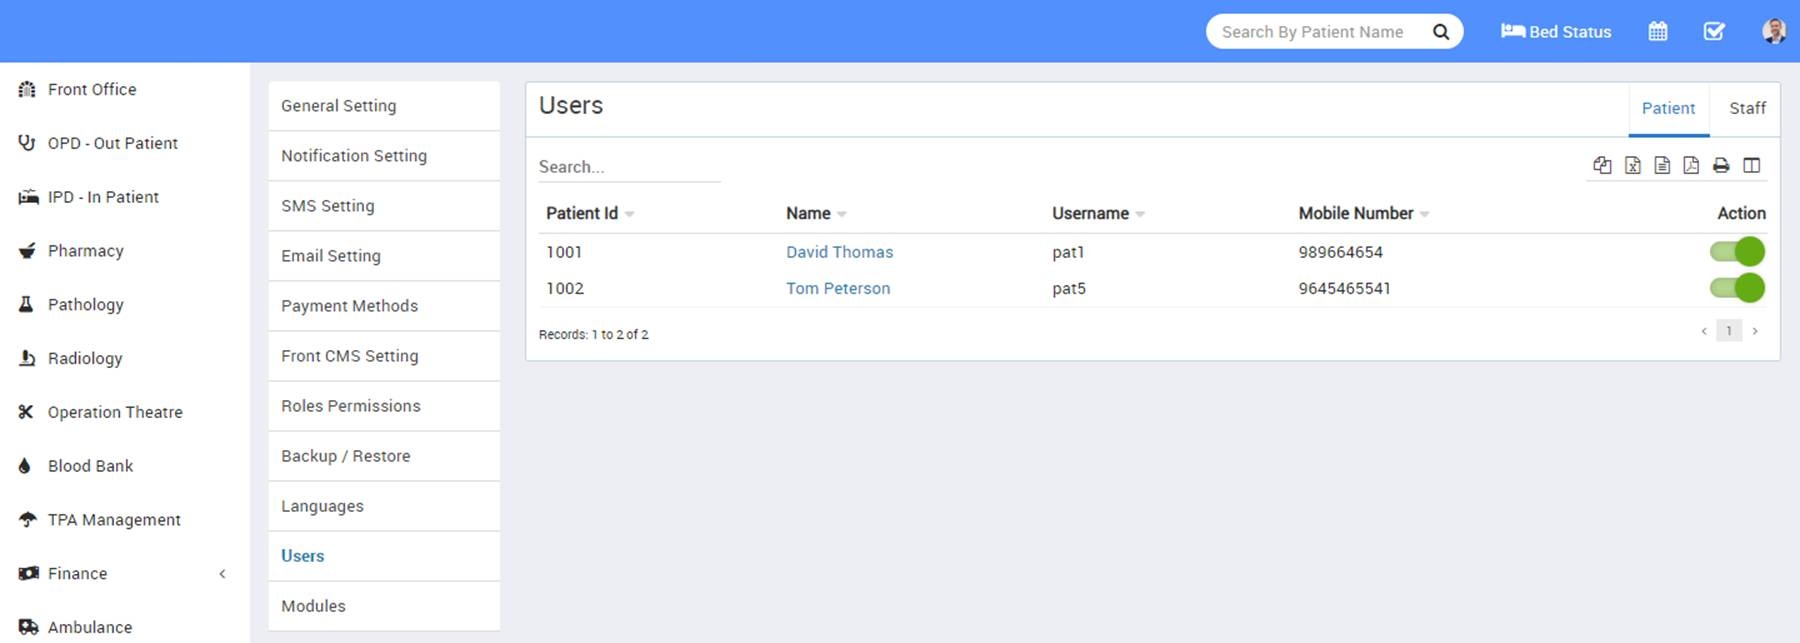
- Users – All the users like Patient, Staff can be see here and you can enable or disable them from login to system. To enable or disable user click on toggle button in Action column.
- Modules – Clinic Medix comes with 25+ modules but there are 19 modules available to enable/disable from whole system. Disabling any module will be disabled from Admin and Patient at once. It works over Roles Permission module so even you have given permission for module but after disabling module will be disabled from whole system. To enable/disable simply click on toggle button present in Action column.

- Patient – Here you can manage patient’s profile data like add, import, enable disable.
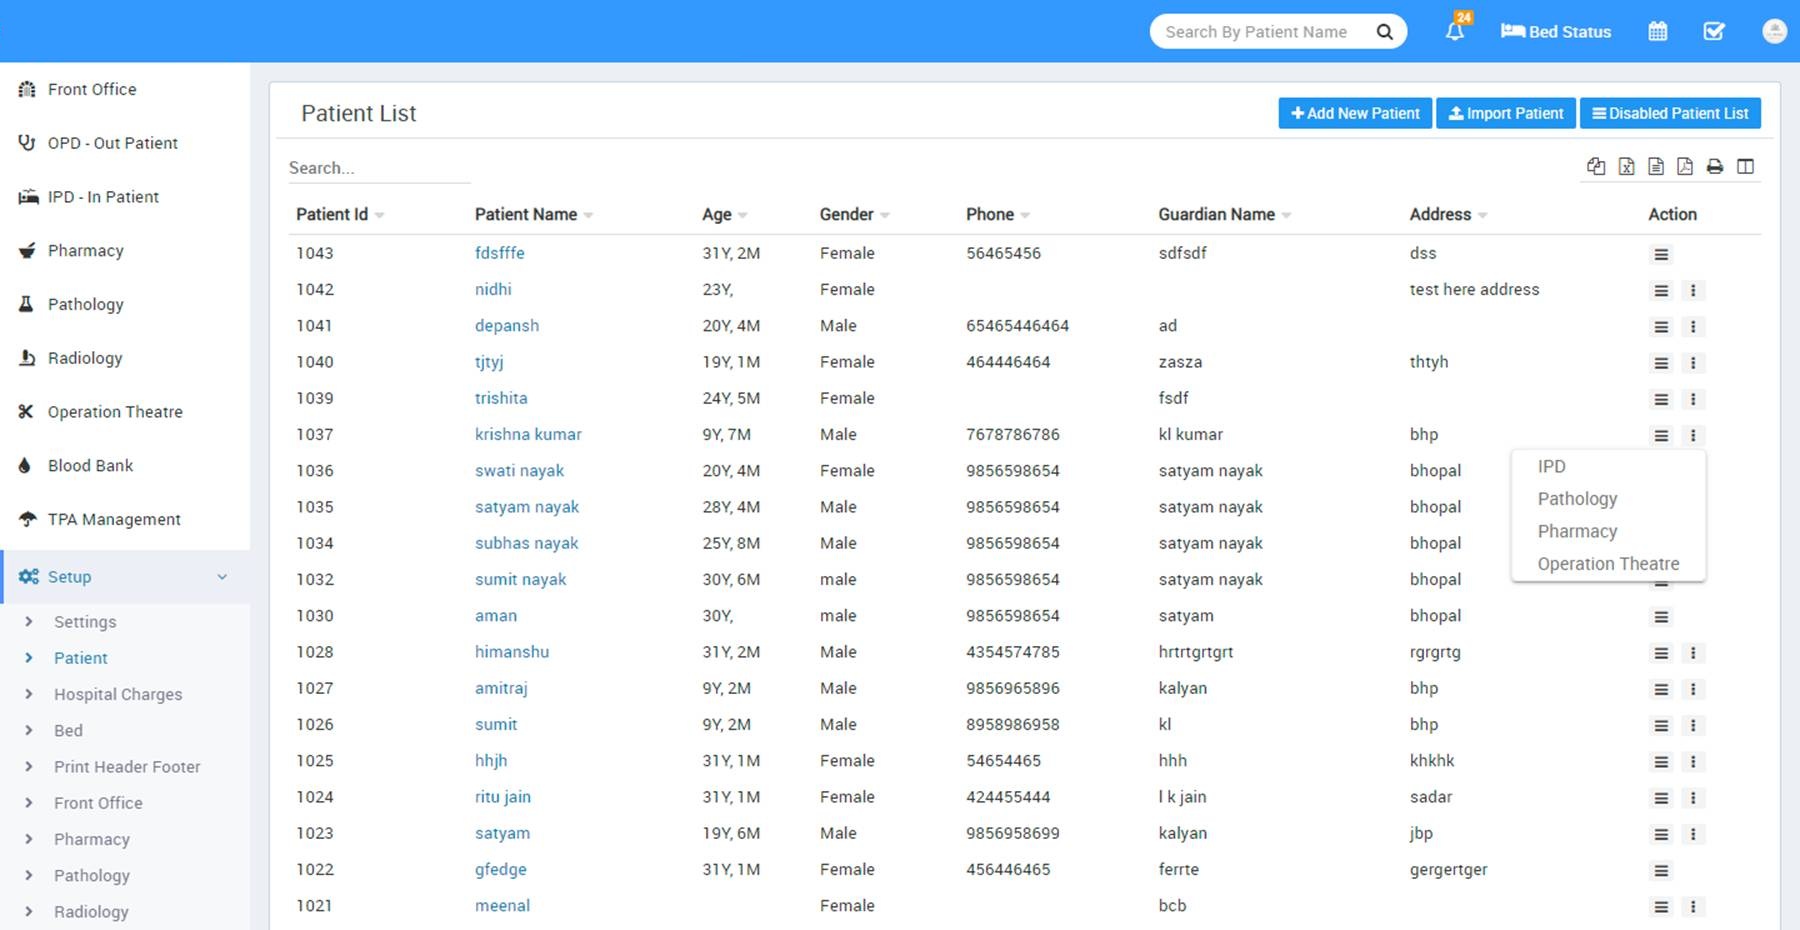
To add new patient click on + Add New Patient then enter patient profile related data then click on Save button.
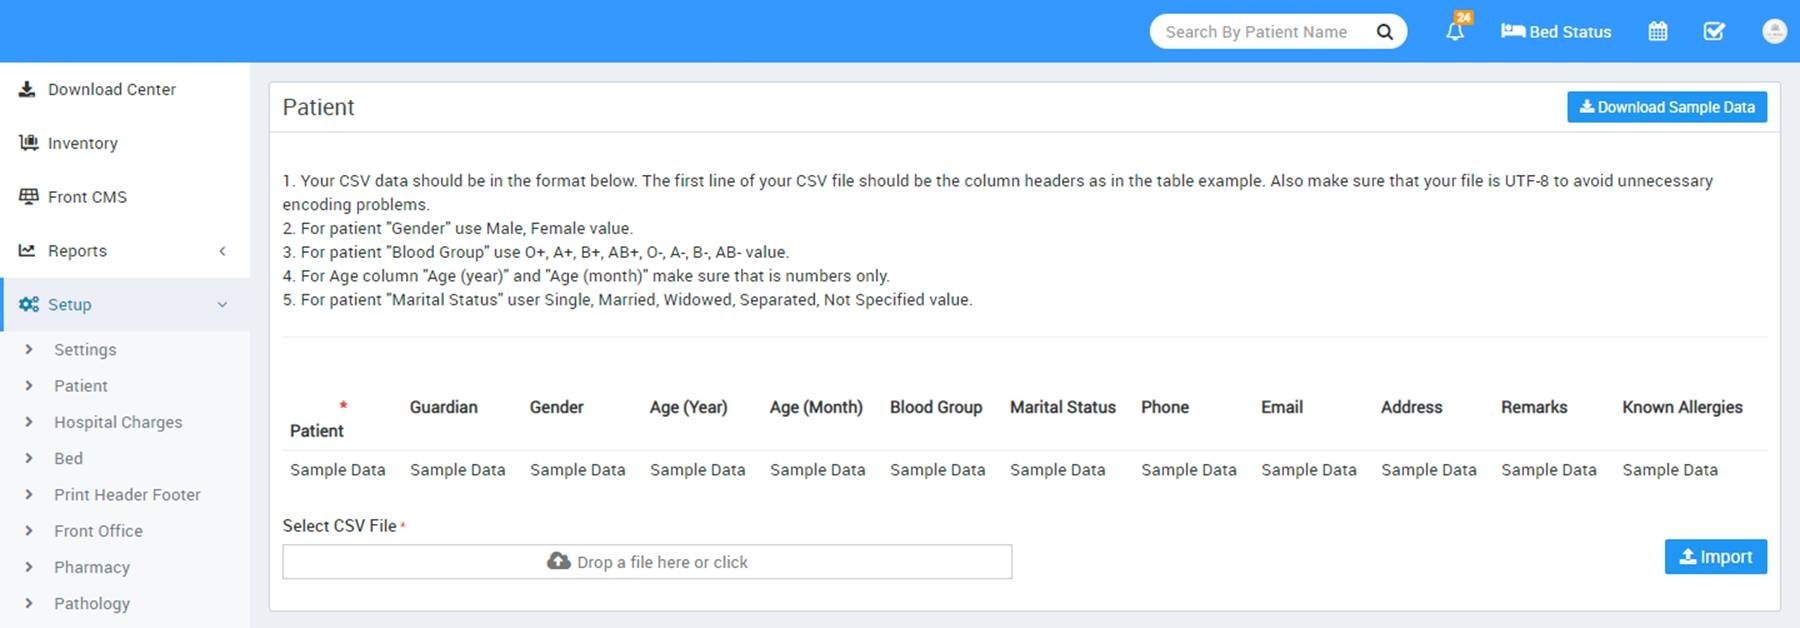
Import Patient is for upload multiple patient data in a single click instead of one by one. For this Select CSV file and click on Import button. You can easily download sample CSV file from here. For this click on Download Sample Data.
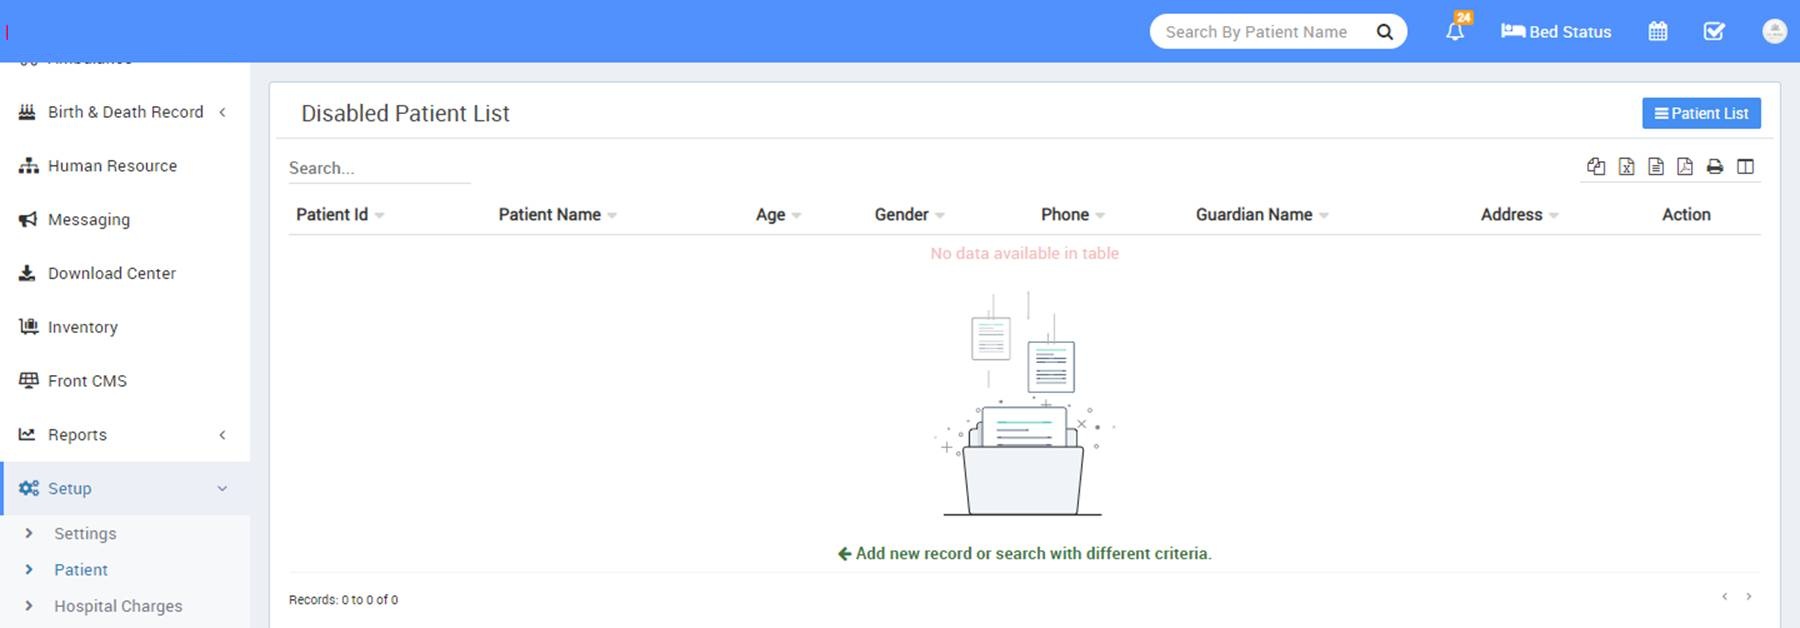
Disabled Patient is for seeing all disabled patient.
- Hospital Charges – Here first we will add Charge Category, for this click on + Add Charge Category button. Now enter Name, Description and select Charge Type like Procedures (is for general ipd charges like doctor visit), Investigations (is for pathology/radiology lab test or other investigations), Supplier (is for other things supply like oxygen charges), Operation Theatre (is for operation theatre charges) and Other (is for other miscellaneous charges).

Now we will add Charges for this click on + Add Charge button. Now enter Charge Type, Charge Category, Charge Code (it is like short code to differentiate two charges for same charge type and charge category), then enter Standard Charge, Description and if there is any Insurance (Third Party Administrator or Insurance organization) is present then enter Scheduled Charges For Insurance also)
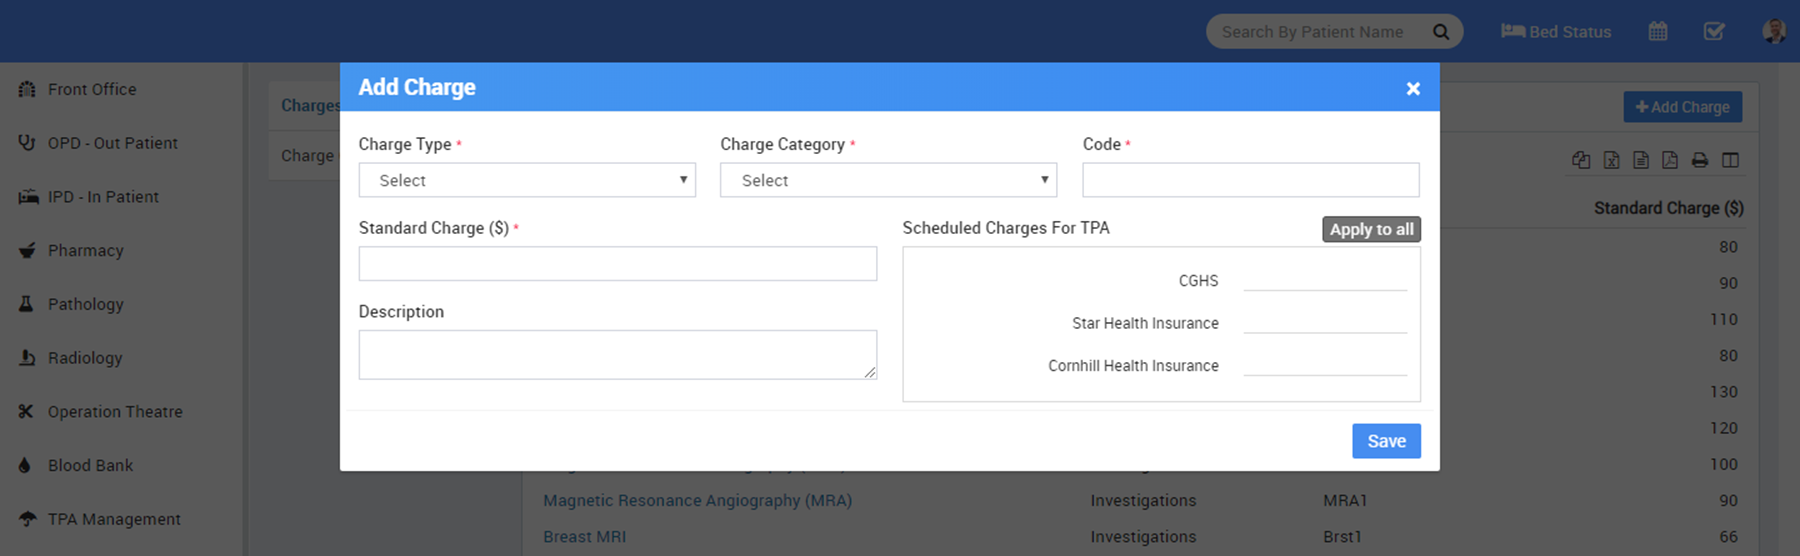
In Doctor OPD Charge, you click on +Add Charge, now select Doctor Name, Standard Charge($). If Charges applicable in TPA, then click on Apply To All.
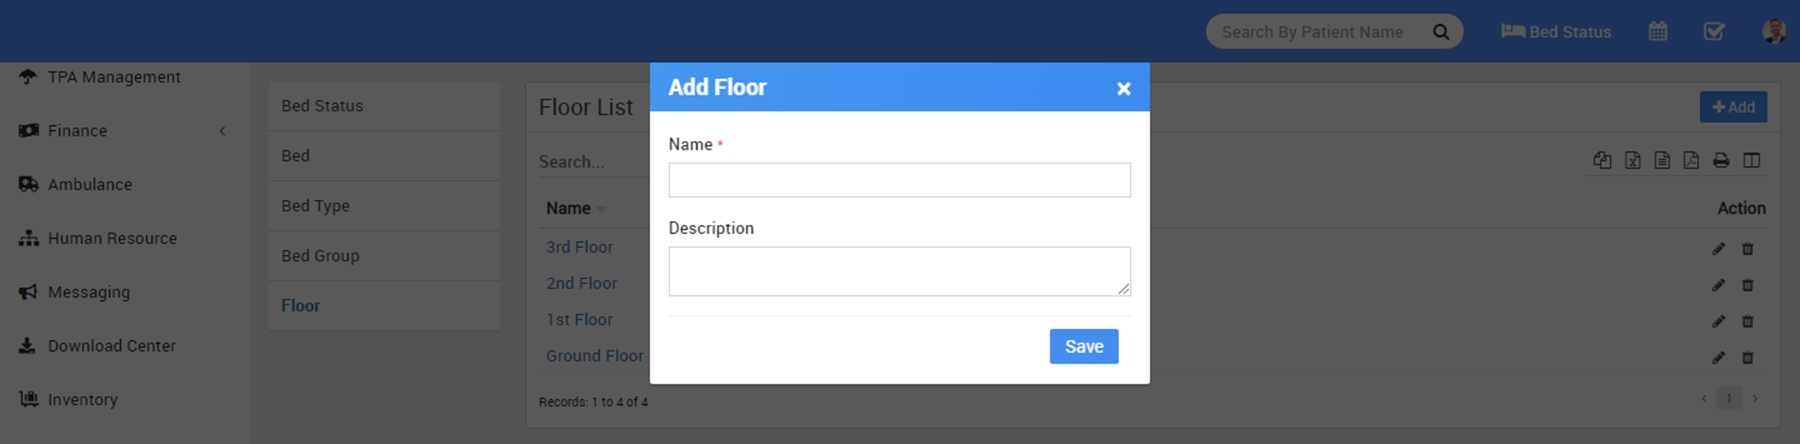
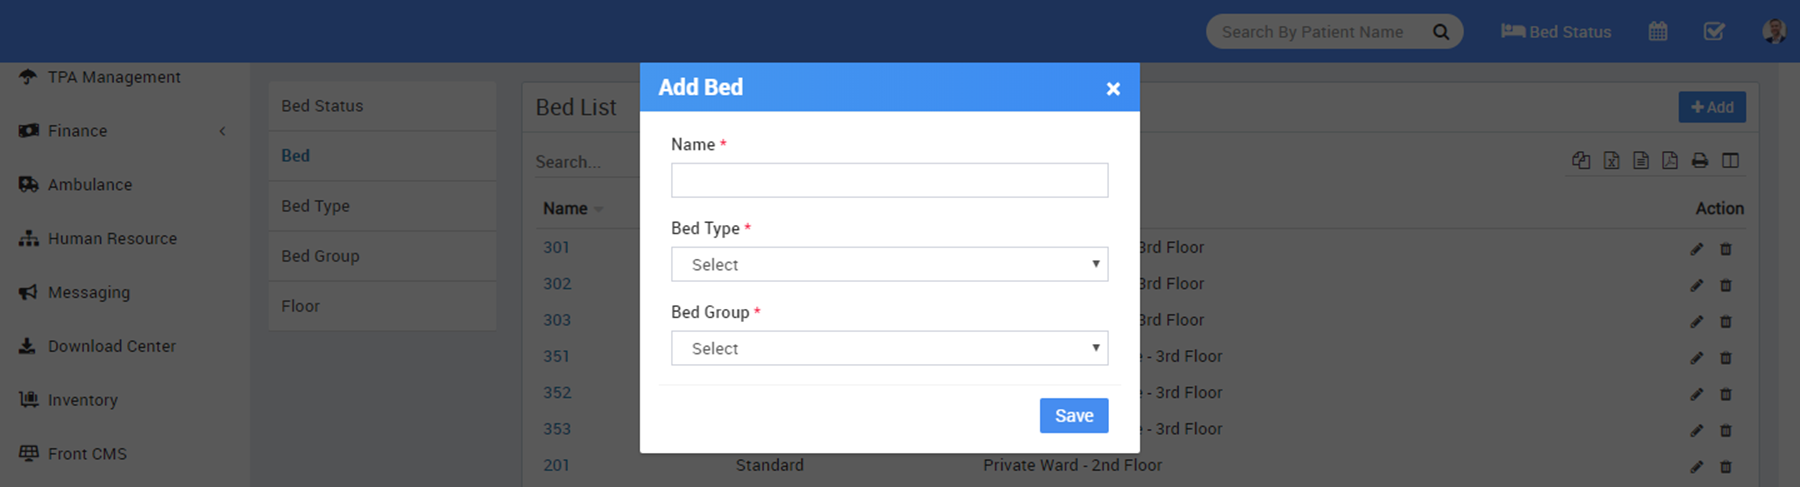
- Bed – here first we will add Floors, Bed Groups, Bed Type.
To add floor click on + Add button then enter Floor Name and Description.
To add bed group click on + Add button then enter Bed Group Name, select Floor and enter Description.

To to add bed type click on + Add button then enter Bed Type Name.

Now to add bed click on + Add button then enter Bed Name, select Bed Type and Bed Group.
At Bed Status page we can check current status of bed.

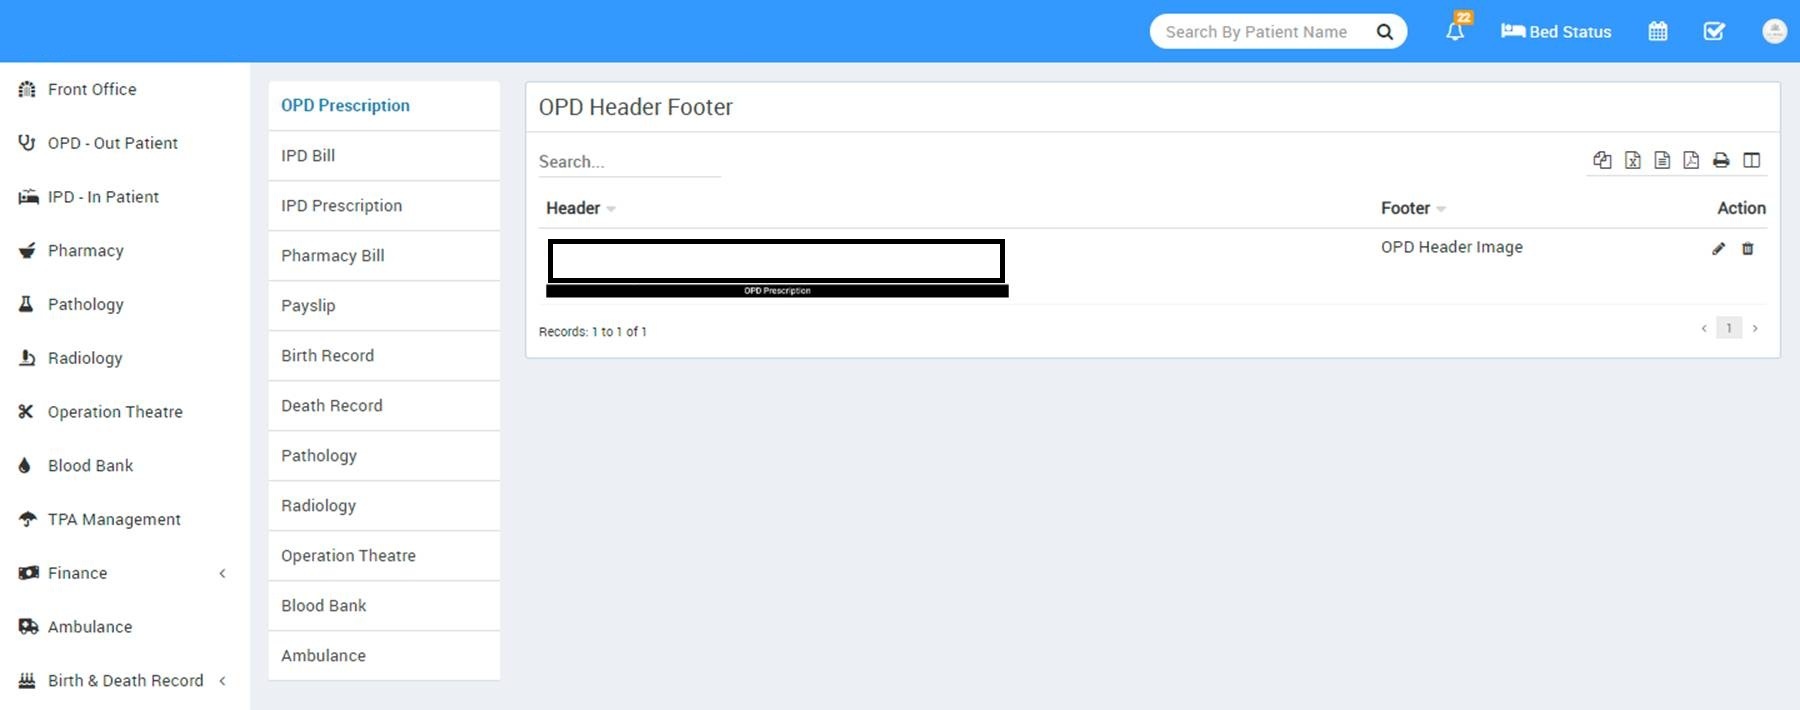
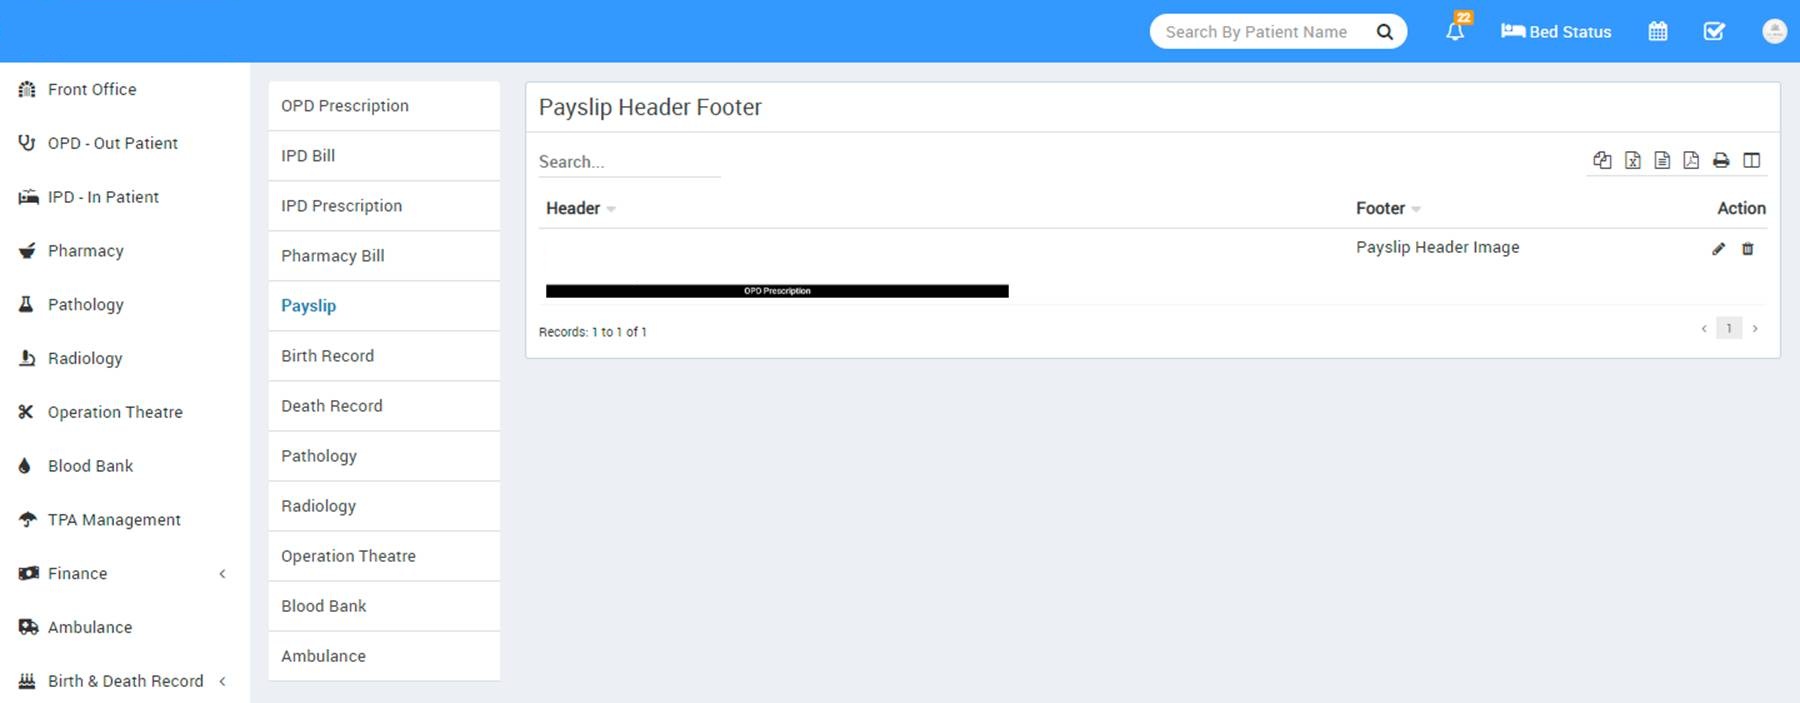
- Print Header Footer – here we will add header and footer in OPD Prescription, IPD Bill, Pharmacy Bill, Payslip.
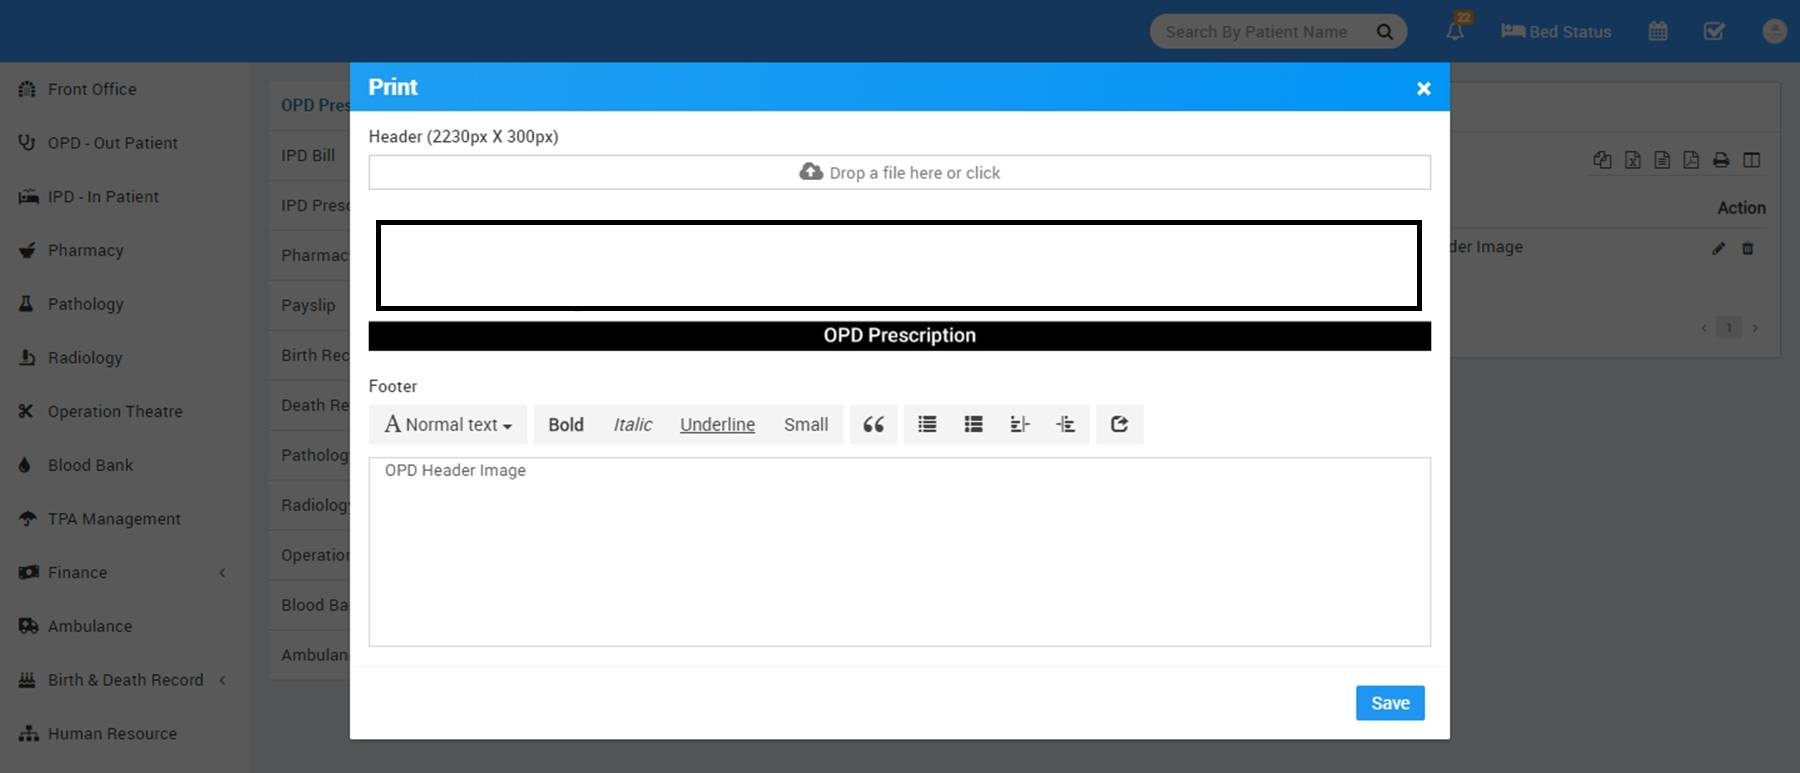
To add OPD Prescription header and footer click on + Add button now select Header image then enter Footer Text.
To add IPD Bill header and footer click on add button now select header image then enter footer text.

To add Pharmacy Bill header and footer click on + Add button now select Header image then enter Footer Text

To add Payroll Payslip header and footer click on + Add button now select Header image then enter Footer Text
To add other modules print header footer do the same thing.
- Front Office
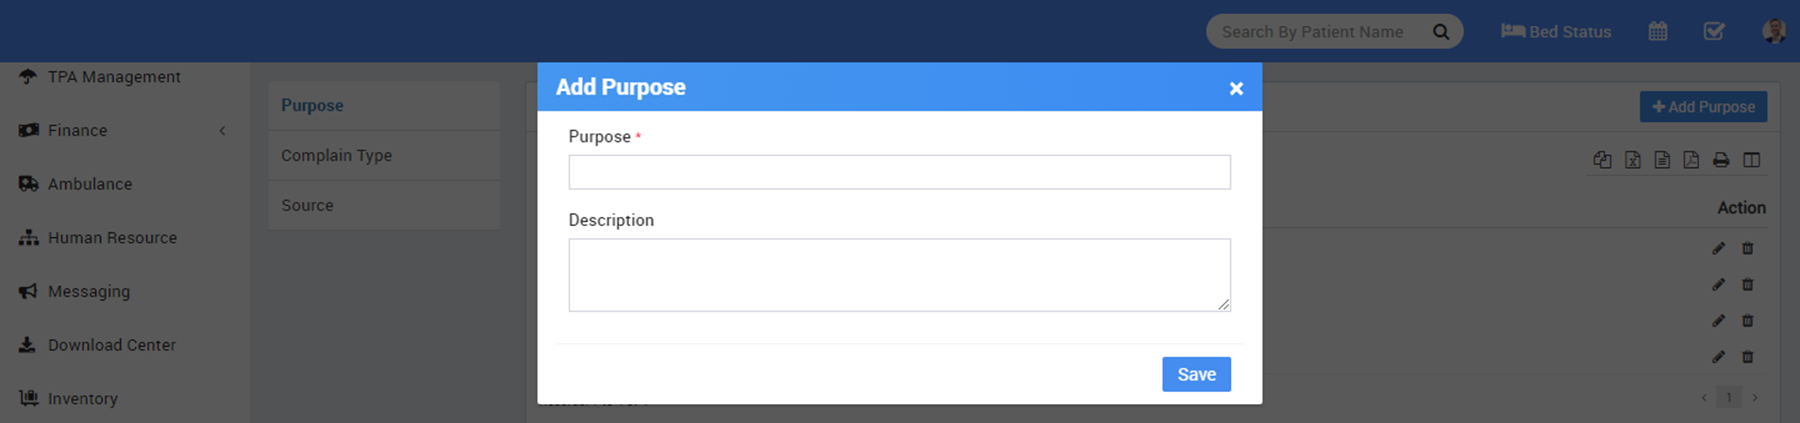
To add Visitor Purpose click on + Add Purpose button now enter Purpose and Description.
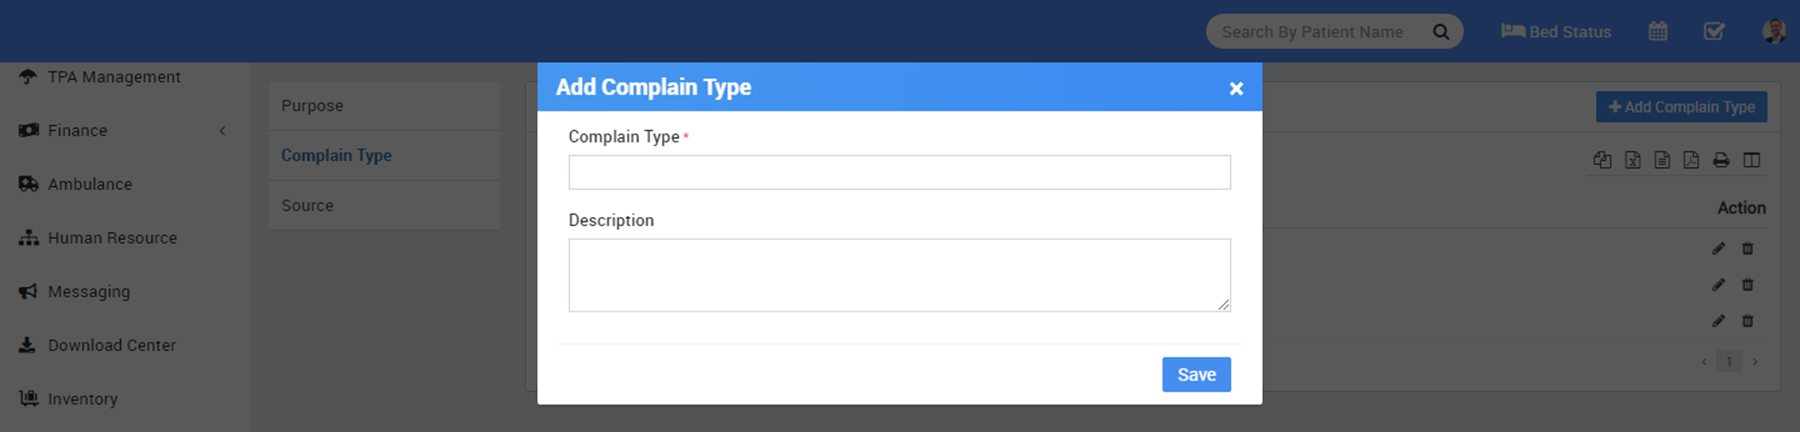
To add Complain Type click on + Add Complain Type button now enter Complain Type and Description.
To add Complain Source click on + Add Source button now enter Source and Description.

- Pharmacy
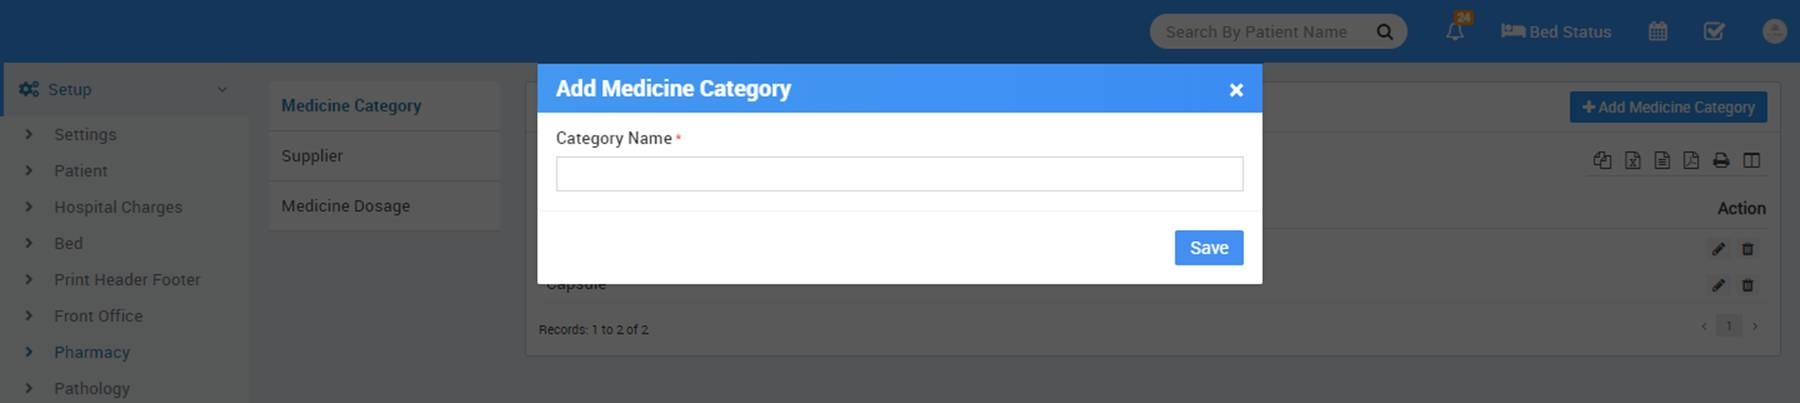
To add medicine category click on + Add Medicine Category now enter Medicine Category Name.
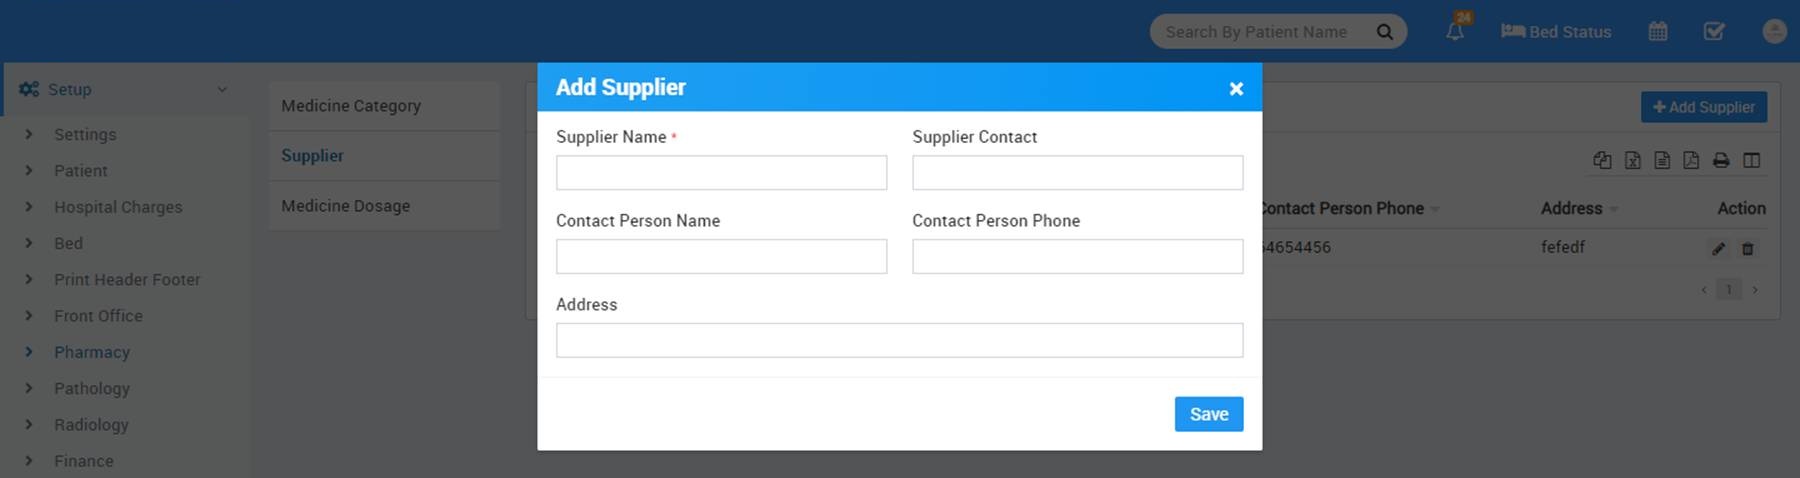
To add supplier click on + Add Supplier now enter Supplier Name, Supplier Contact, Contact Person Name, Contact Person Phone, Address.
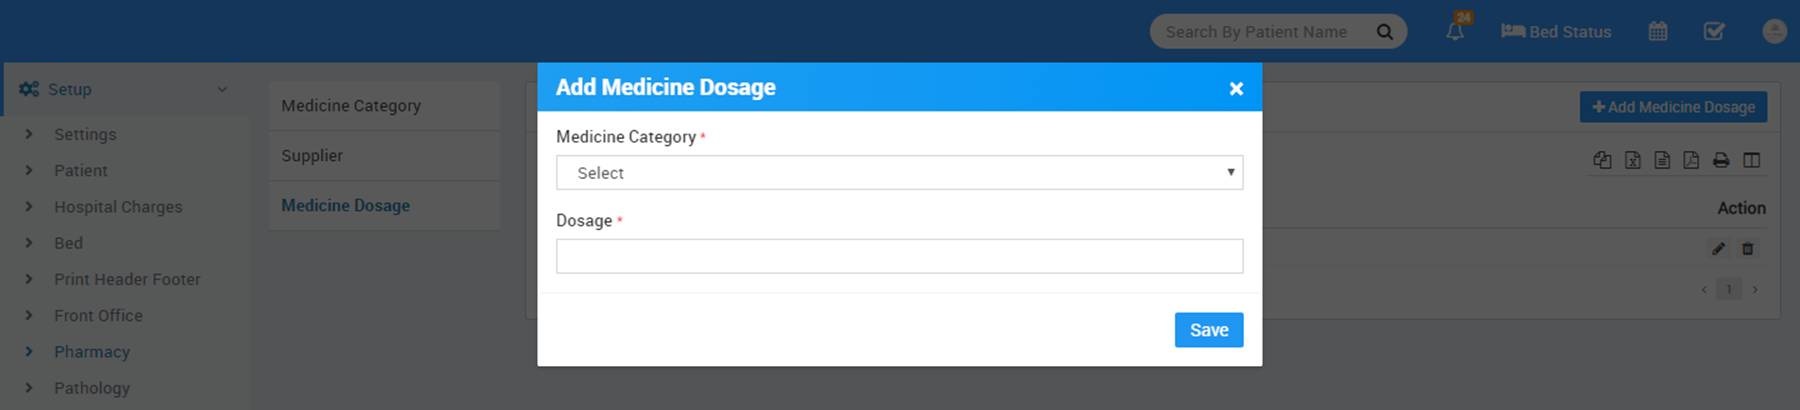
To add medicine dosage click on + Add Medicine Dosage now enter Medicine Category, Dosage.
- Pathology
To add Pathology Category click on + Add Pathology Category now enter Pathology Category Name.

- Radiology
To add Radiology Category click on + Add Radiology Category now enter Radiology Category Name.

- Finance
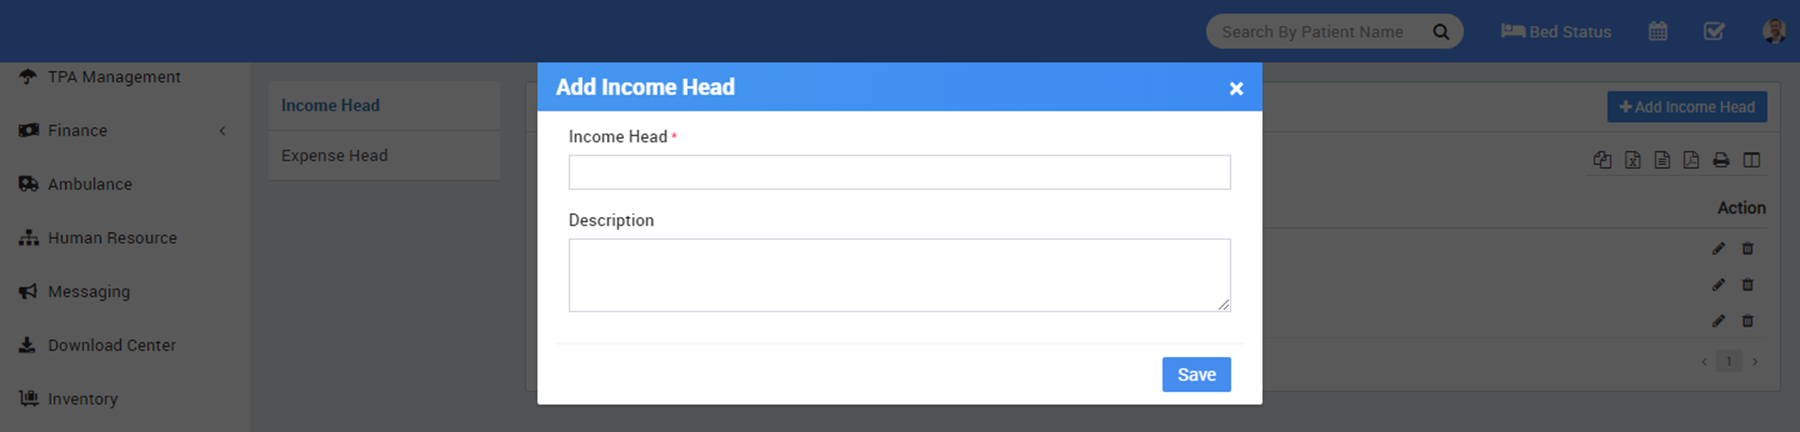
To add Income Head click on + Add Income head button now enter Income Head and Description.
To add Expense Head click on + Add Expense Head button now enter Expense Head and Description.

- Birth and Death Record
You can add input box custom field in birth and death record.
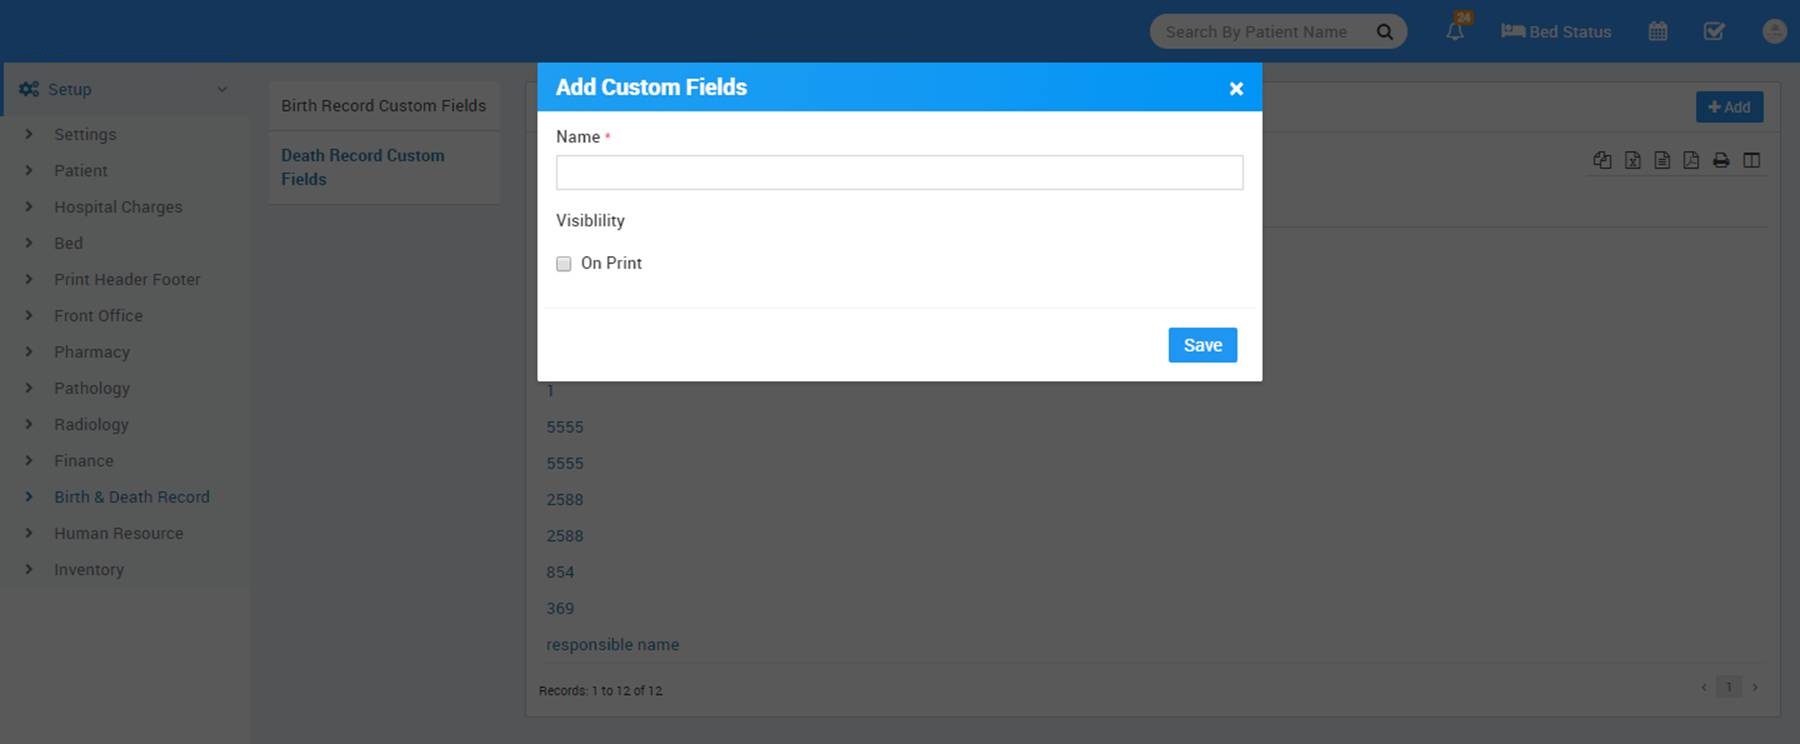
In Birth Record Custom Field , click on + Add button, here you add desired custom field and click on checkbox for Visibility On Print. This will enable your custom field for visible in print certificate.

In Death Record Custom Field , click on + Add button, here click on checkbox for Visibility On Print. This will enable your custom field for visible in print certificate.
- Human Resource
To add Leave Type click on + Add Leave Type button now enter Leave Type Name.

To add Department click on + Add Department button now enter Department Name.

To add Designation click on + Add Designation button now enter Designation Name.

- Inventory
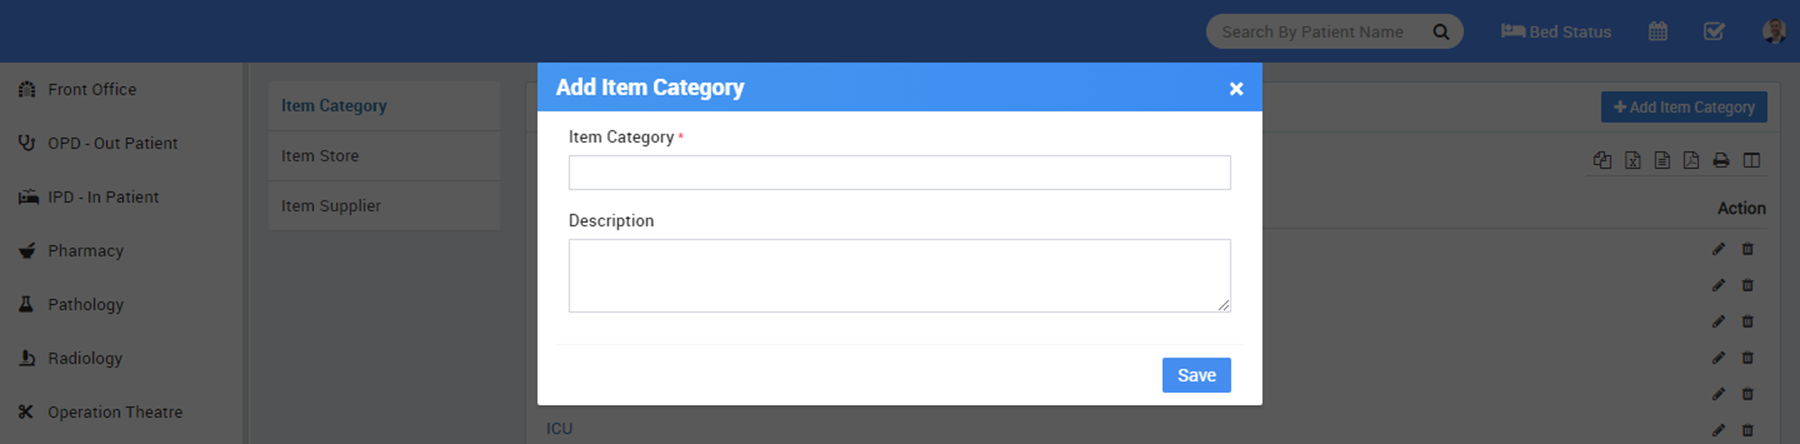
To add Item Category click on + Add Item Category now enter Item Category and Description.
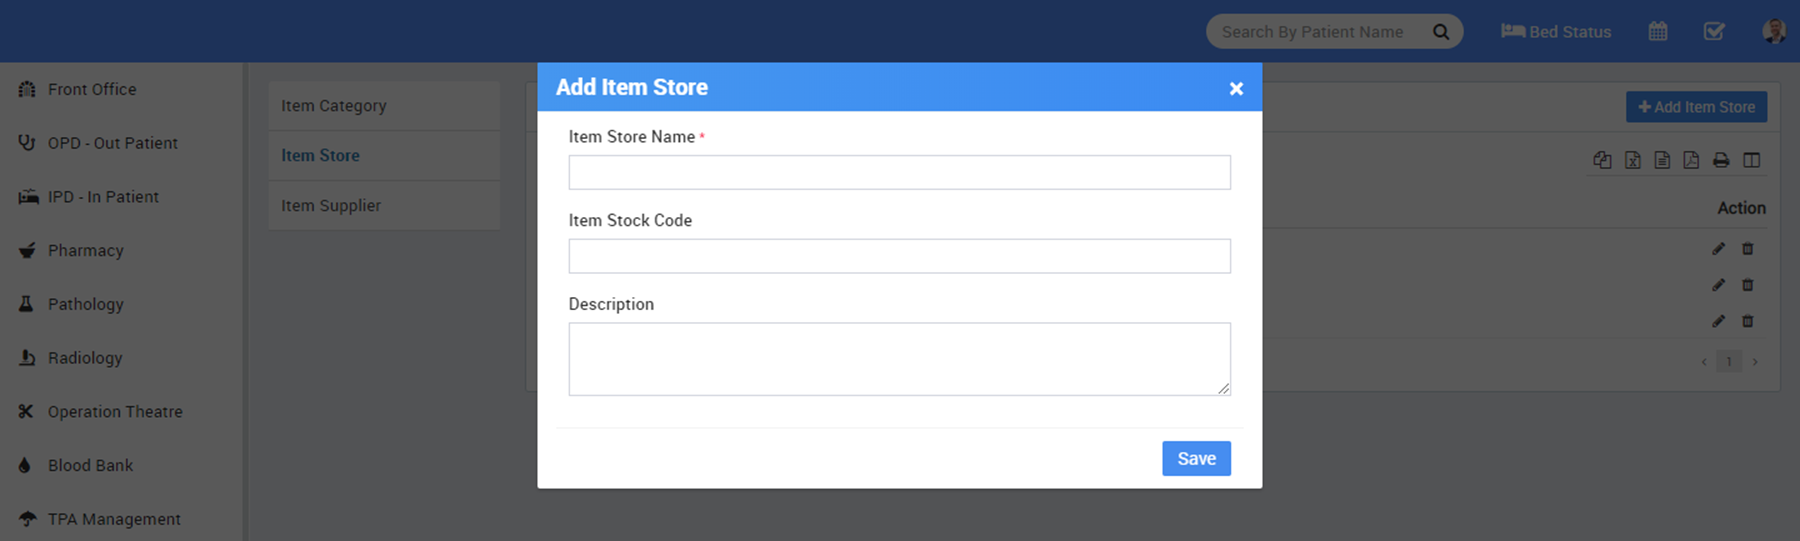
To add Item Store click on + Add Item Store button now enter Item Store Name , Item Stock Code and Description.
To add Item Supplier click on + Add Item Supplier button now enter Item Supplier Name, Phone, Email, Contact Person Name, Address, Contact Person Phone, Contact Person Email and Description.
